I thought I would share this Manufacturer’s List. Lots of interesting stuff all in one place. No affiliation whatsoever on my part: For Informational Purposes Only.
Pin Posts

*Not responsible for any purchases made!

Seek, Catch, Release, Protect
I thought I would share this Manufacturer’s List. Lots of interesting stuff all in one place. No affiliation whatsoever on my part: For Informational Purposes Only.
Pin Posts
*Not responsible for any purchases made!
Right out of the gate I will state that I don’t NEED any new rods or reels. These are purely WANTS/WISHES…(this statement WILL come back to haunt me!) And I am not saying that I will purchase any of these items, I’m just curious about them. I’m sure my wife is biting her fingernails and worrying because she knows I tend to “gear up” during the winter months in preparation for the upcoming season. But these are a few items that have piqued my curiosity…

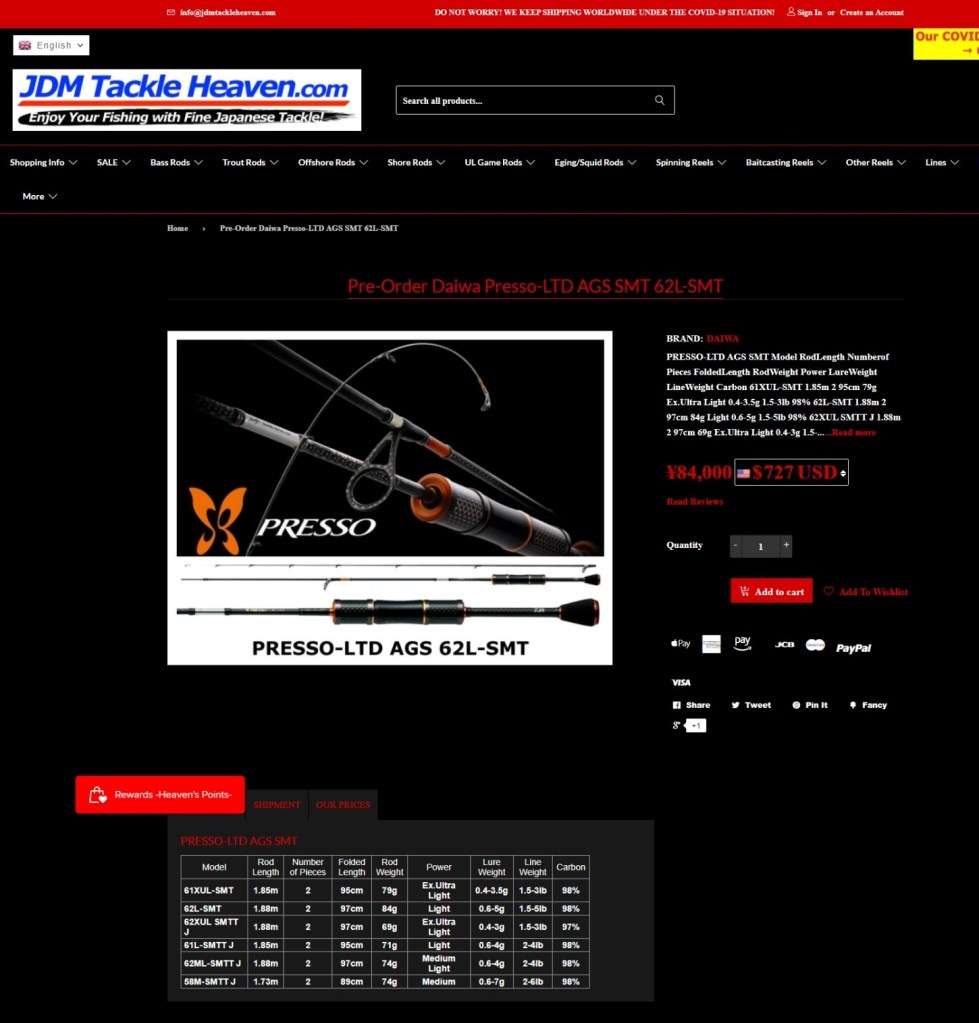
First up is the new Daiwa Presso LT reel. This is the “update” to the Daiwa 2017 Presso LTD series. Unfortunately this reel is no longer made in Japan but has been outsourced to China. I like the idea of the monocoque body and I really like the color scheme of this reel. It seems to be a bit more muted compared to the Presso LTD 1025 that I own. Bearing count (12+1) is the same so it should be smooth. The 2021 Presso LT 1000S-P weighs 145grams(5.1oz) while the Presso LTD 1025 weighs in at 155grams(5.47oz). A 10gram difference. Probably too minor to really notice.
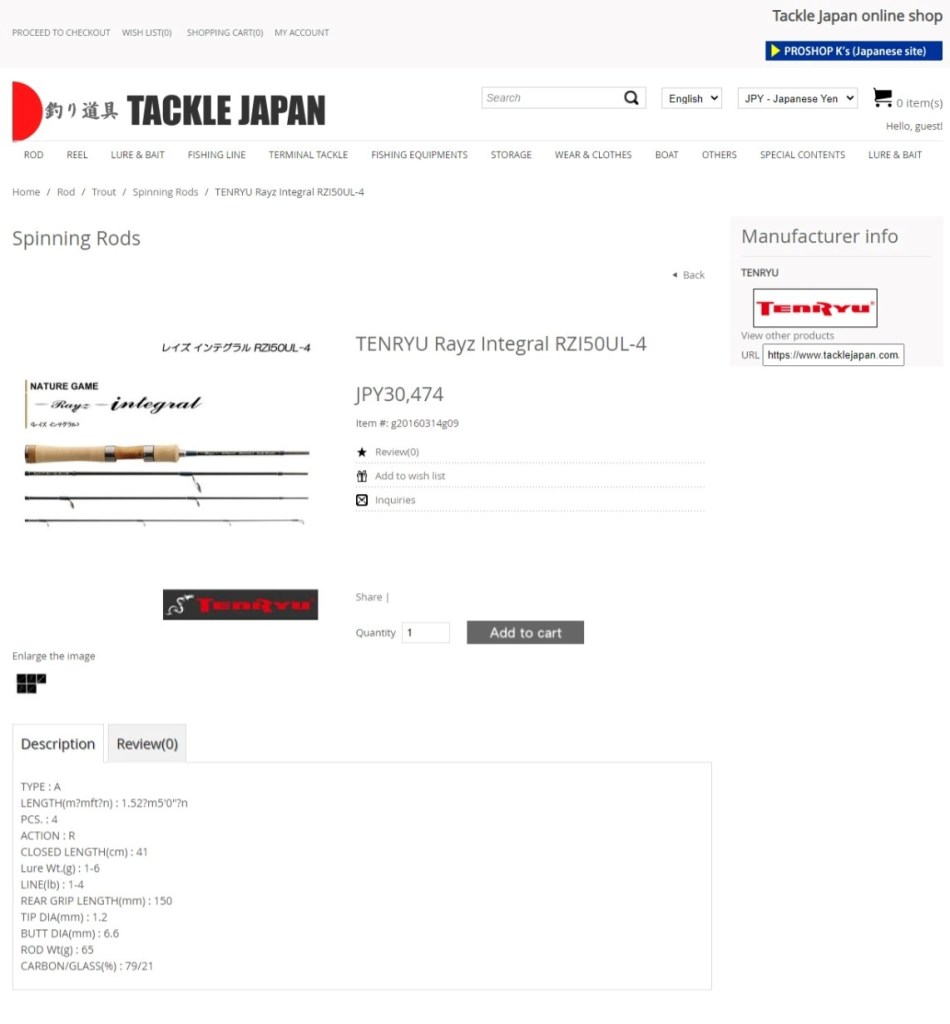
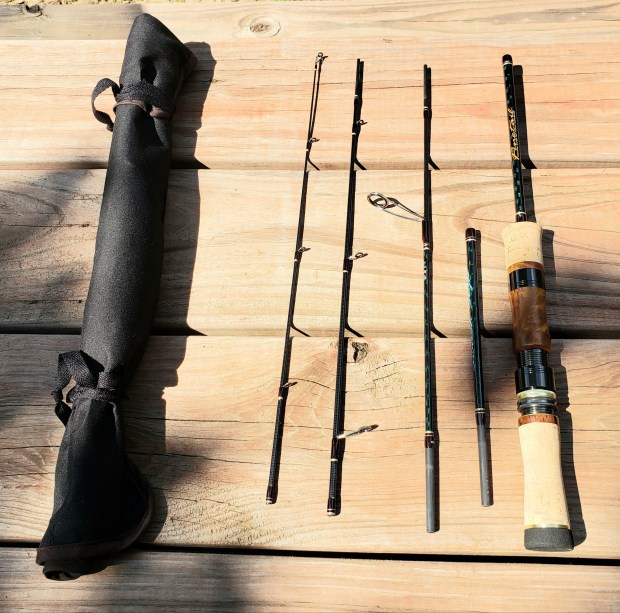
I have a “thing” for multi-piece rods since it suits our style of fishing. I was curious about the next level of these style rods and looked to Tenryu for an option. I own a Tenryu Lunakia 610 and know that they make high quality rods. This Rayz Integral is definitely a contender.

I know nothing about Timon rods but this one interested me especially at this price point. I have yet to buy a bad JDM rod. A rod worth considering.

I hear great things about Smith rods so I thought I’d take a look at their offerings. Again, this is obviously a multi-piece rod and seems quite interesting.
NOTE: This is where my wife needs to stop reading this blog post!
If I win the lottery or if money were no object…I would seriously entertain buying this rod. I like the looks. I really like the components, especially the rod guides.
As I’ve said MANY times before, I am curious by nature. And after owning several mid-tier JDM rods, I am wondering what the next level up would be like. But it’s really hard to justify an expenditure of that size. Safer to just drool…
I took a chance buying these jig heads and soft plastic lures last year. As it turns out, we used them almost exclusively for the entire 2021 fishing season.

The jig heads are from http://www.digitaka.com and are the Owner Cultiva JH-85 Nagare Dama and the JH-86 Cross Head. The weights we used were 2.2grams up to 3.0grams. They have two tie points on them depending on how you want to present them. Keep in mind that the target species was our native smallmouth bass and they don’t reach near the size of the Northern strain smallmouth bass. These hooks were fine for the Neosho strain smallmouth.

For soft plastics we opted for the Eurotackle Micro Finesse B-vibe 2 inch paddle tail swimbait.

Our colors of choice were Green Pumpkin, Bluegill Pro and Black. These were very productive for us and we plan on continuing their use for 2022.
As we tweak our gear and lure selections, we tend to carry less tackle. We continually strive for efficiency to keep from being overburdened and to maximize our time on the water. Food for thought…
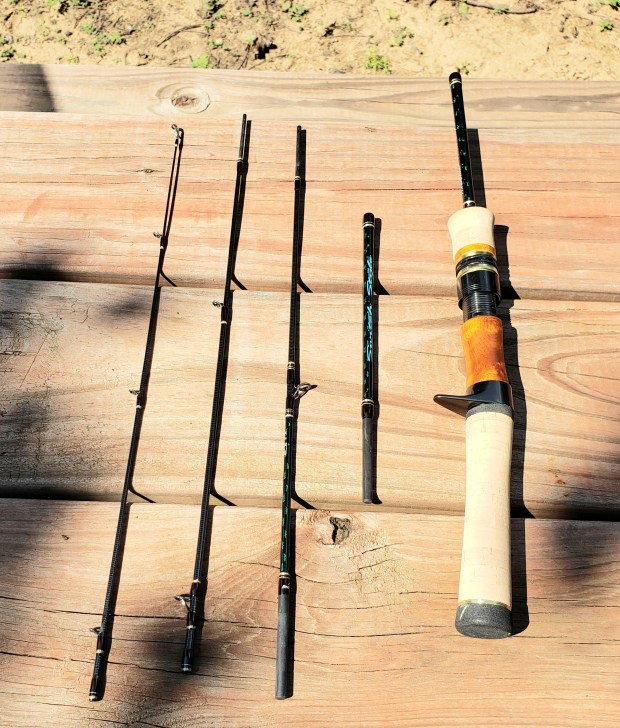
I prefer to fish streams so all of my gear is generally tailored for that application. As such, we fish out of backpacks quite often so the rods are usually multi-piece for portability. Also, we specifically target our indigenous smallmouth bass which rarely reach 3 pounds so we don’t need heavier tackle.
The rod I used the most was the Majorcraft Finetail Trekking and Traveler Switch Style FTX-46/505UL.
My favorite spinning reel of 2021 turned out to be the Shimano Stradic FL 1000S. This reel blew the Vanford 1000 out of the water! Price to performance was exceptional.

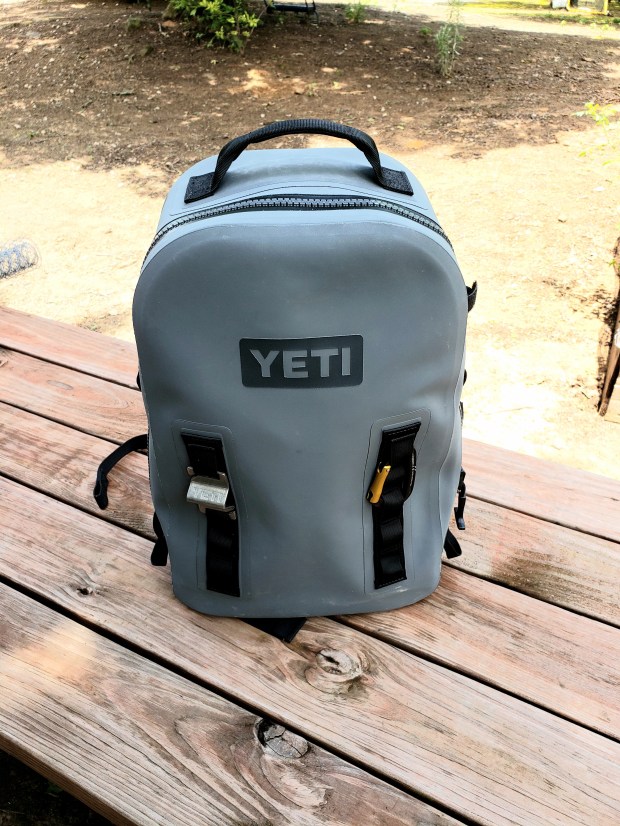
The Yeti Panga 28L waterproof and submersible backpack was outstanding. Expensive but extremely durable and useful for my needs. Worth every penny and holds everything I could need for a day or two on the river.
My baitcast rod of choice was a tie this year. I used both the Majorcraft Finetail Trekking and Traveler Switch Style FTX-B46/505UL and the Majorcraft Finetail Area Stage FAX-B642UL. Both were great rods.


My Baitcast reel of choice was the Shimano Calcutta Conquest BFS-HG Left. An expensive reel, but it worked really well and I had a lot of fun fishing with it.

We had a great year of fishing and managed to explore some new water. We had arbitrarily stated we wanted to make 25 trips during 2021 and according to my fishing journal we reached 27 trips. We spent a lot of time researching gear and tackle but managed to escape without any duds for the year. Everything worked perfectly for our style of fishing.
I can HIGHLY recommend http://www.digitaka.com for reels and http://www.jdmtackleheaven.com for rods.
Here’s to 2022 possibly being a better year of fishing! Cheers…
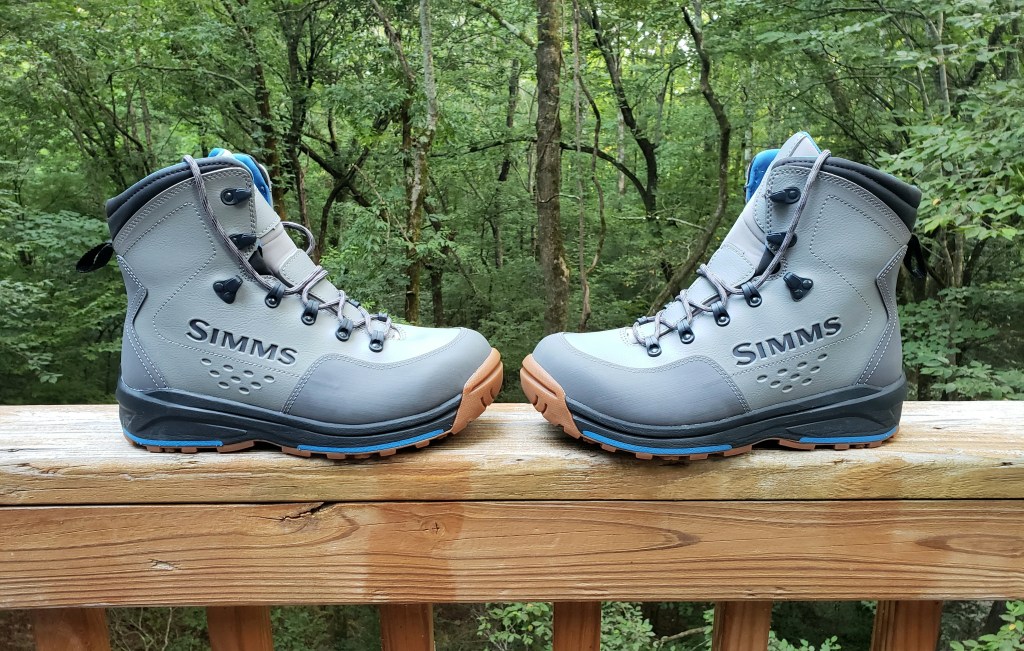
My other wading boots, the Simms Flats Sneakers, were having delamination issues with the soles. I took them to a local cobbler for repair but that didn’t work too well. I have since done my own repair but have not tested them yet.
I opted to get a pair of Free Salt boots for an upcoming trip we have planned. The construction on these boots is burly. My only complaint so far is the lack of a removable insole. The footbox is roomier than expected but I have a wide forefoot so they should work OK.
I opted to use the Simms Guide Guard wading socks with these boots.

These boots lace up securely and don’t seem to be too cumbersome or overly bulky. I wear a size 10 but purchased a size 11. They fit with a fingers width from the front of the boot, so walking downhill won’t be an issue. Looking forward to putting these on and wading a river!
UPDATE: The wife and I rented a canoe to fish a 10 mile stretch of the Ouachita River in Arkansas. We stopped often and wade fished the runs and riffles. I wore these boots for 9 hours straight and did not have any issues. They were comfortable (not as comfortable as my Flats Sneakers) and provided great ankle support while wading through sections of riffles. Even portaging a canoe around a low-water bridge, they did fine. Time will tell how they hold up in the long run, but I plan on using them as often as possible.
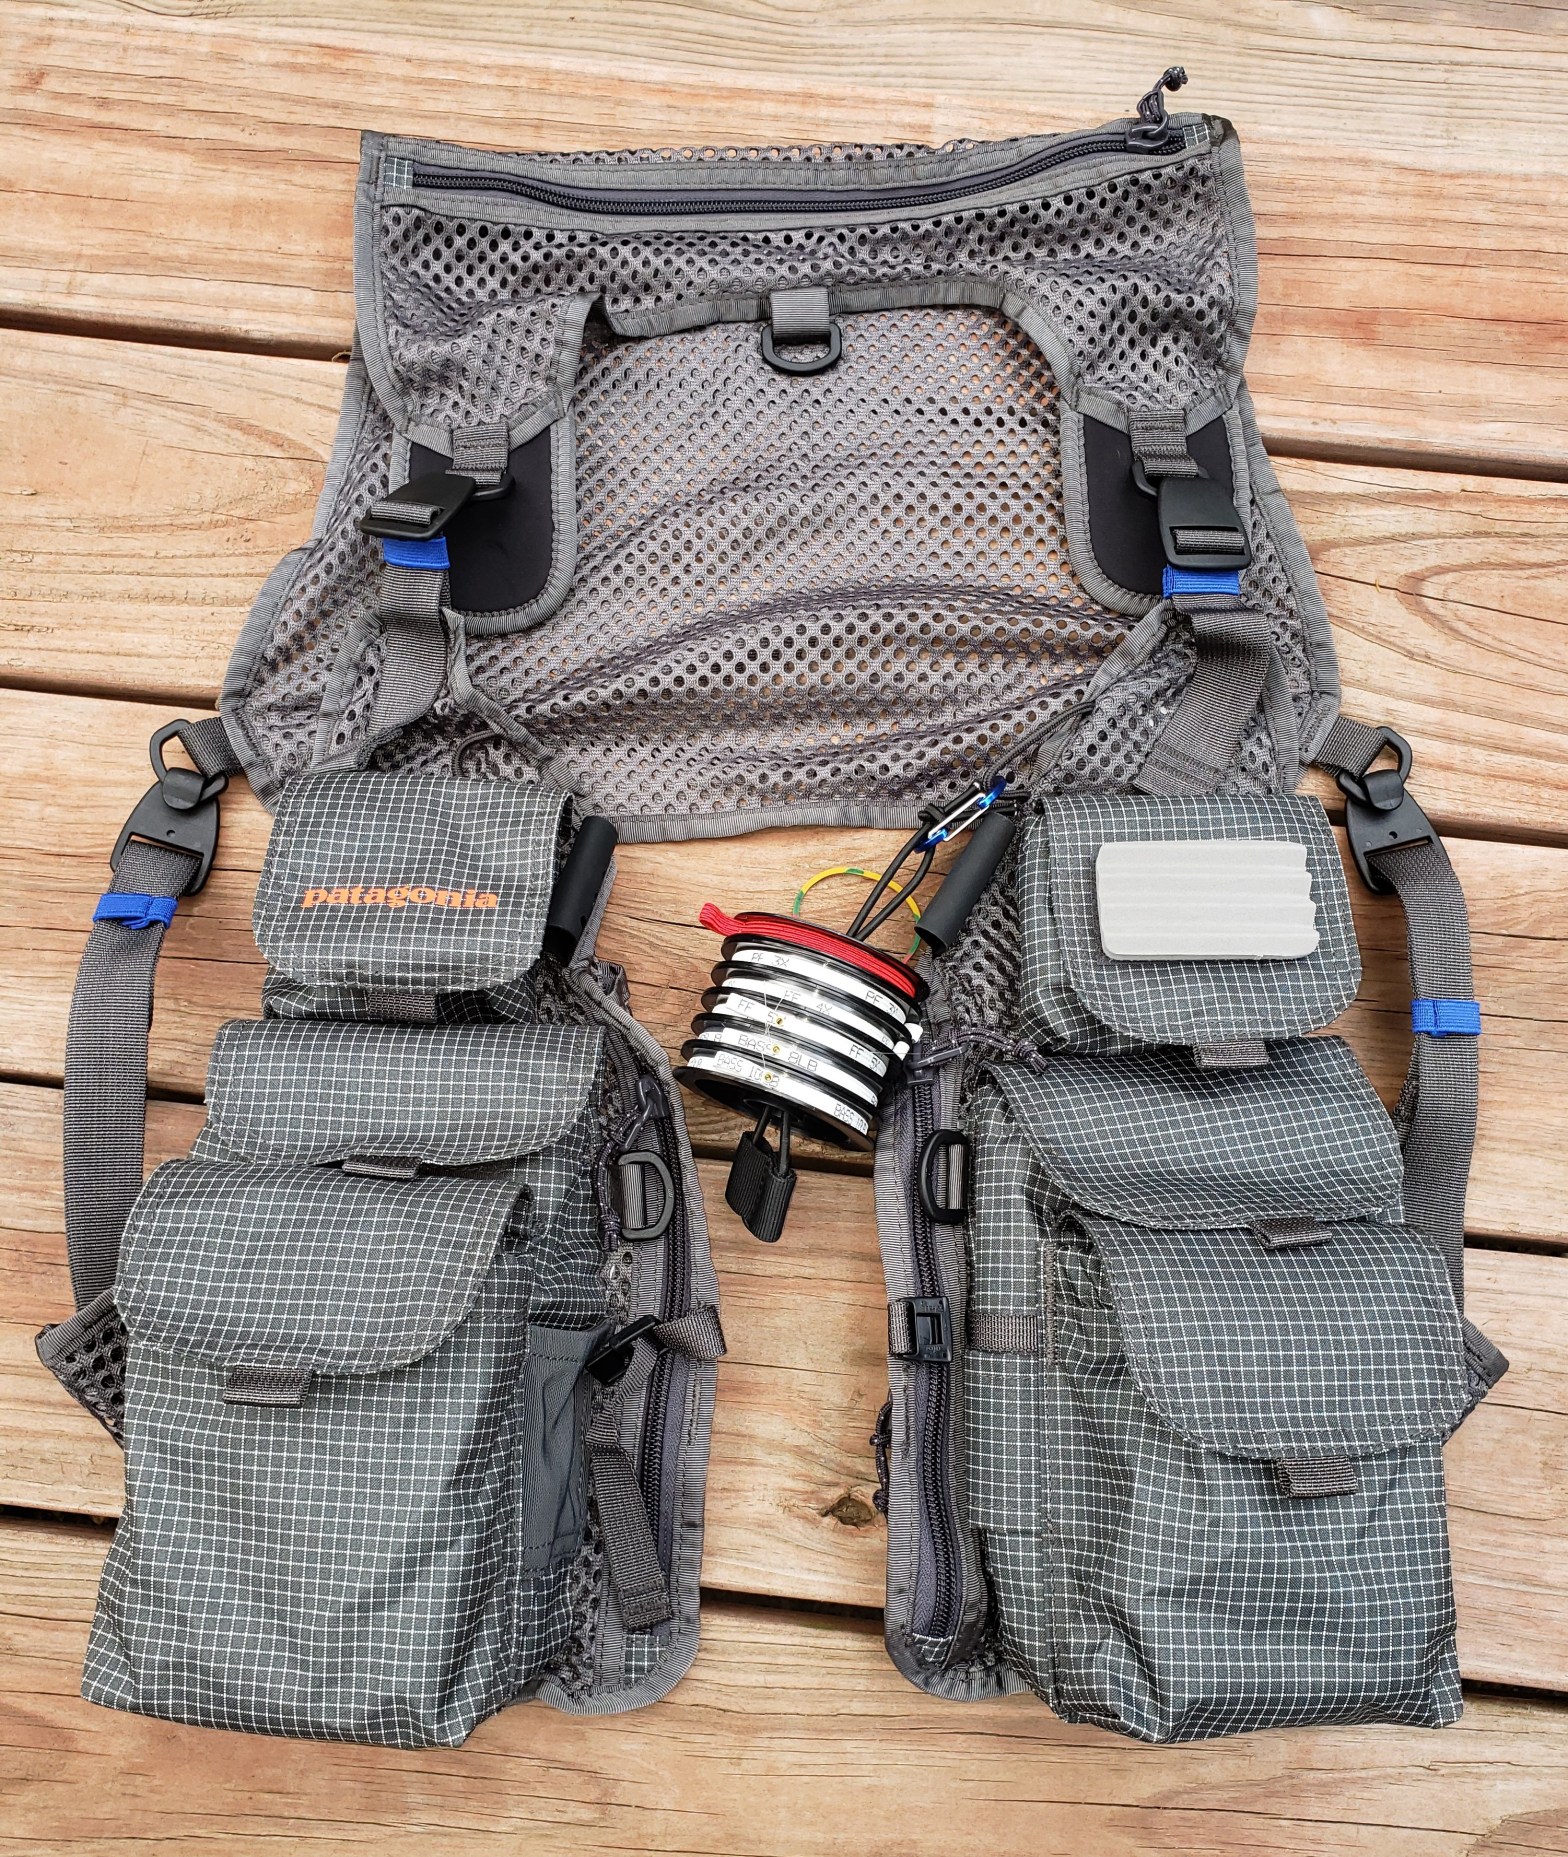
I thought I’d write a blog post about this backpack since I have used it quite a bit over the past 2 years. I usually carry it when someone else is fishing with me so I can carry their rain jackets, phones, a water filter pump, spare water, lunch etc.
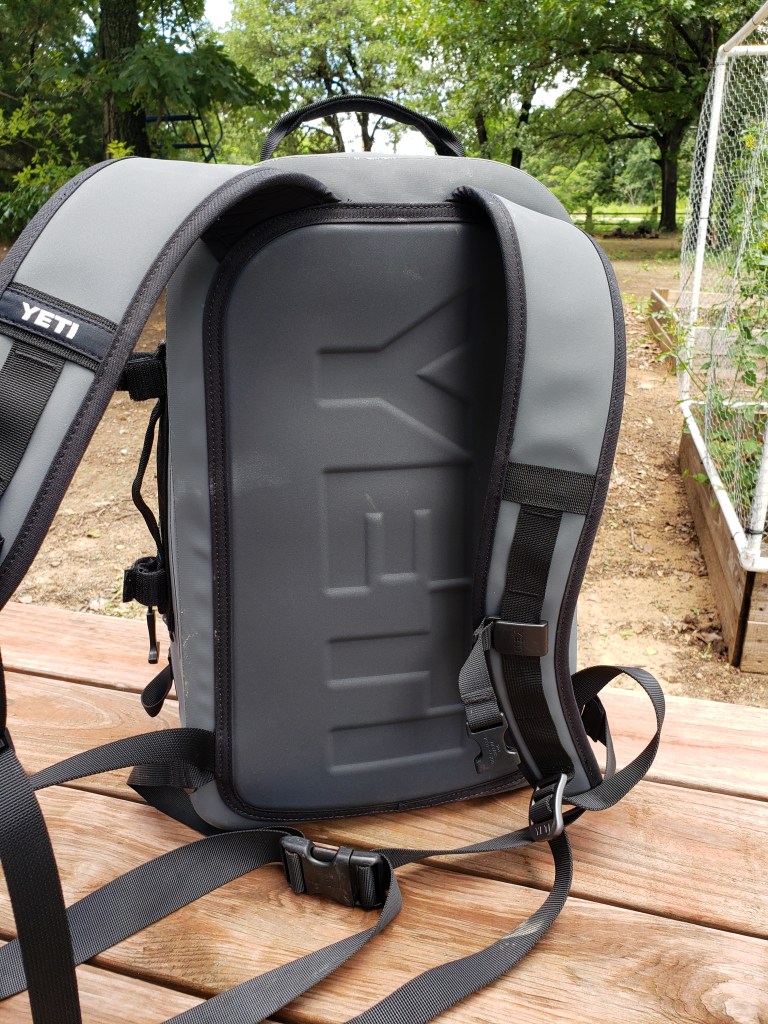
The construction of this pack is exemplary so I won’t complain too much about the price tag. In this instance, you DO get what you pay for. And the main selling point for me was that it is waterproof and submersible. I have used it several times as an impromptu flotation device to help get me across deep water.


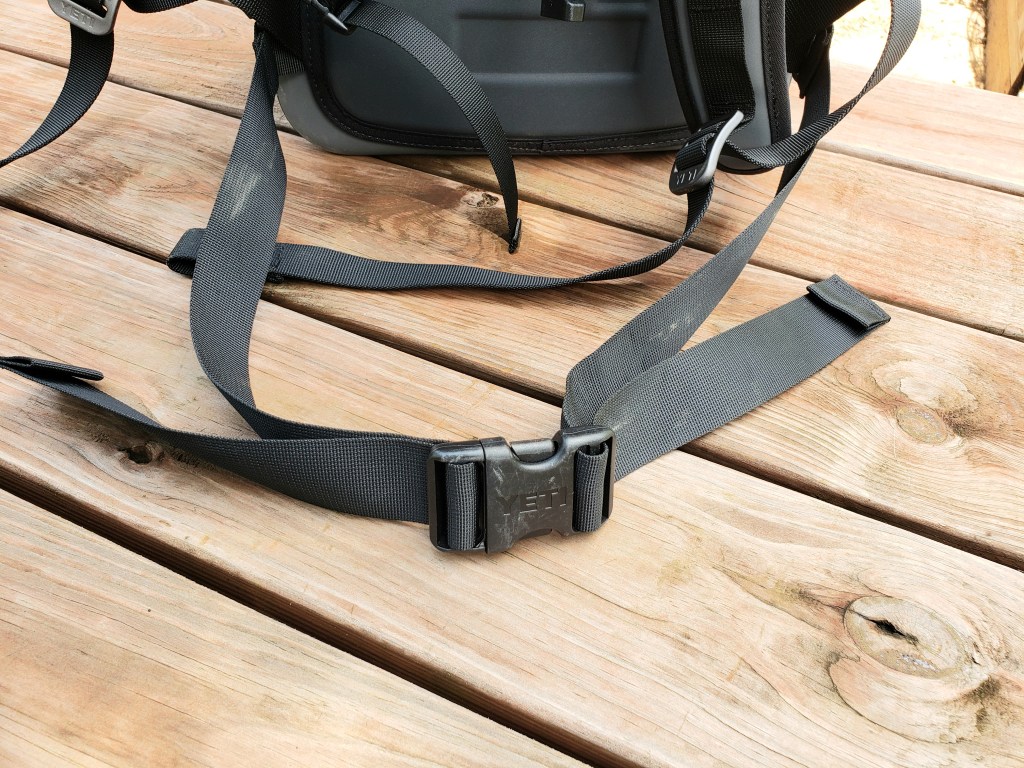


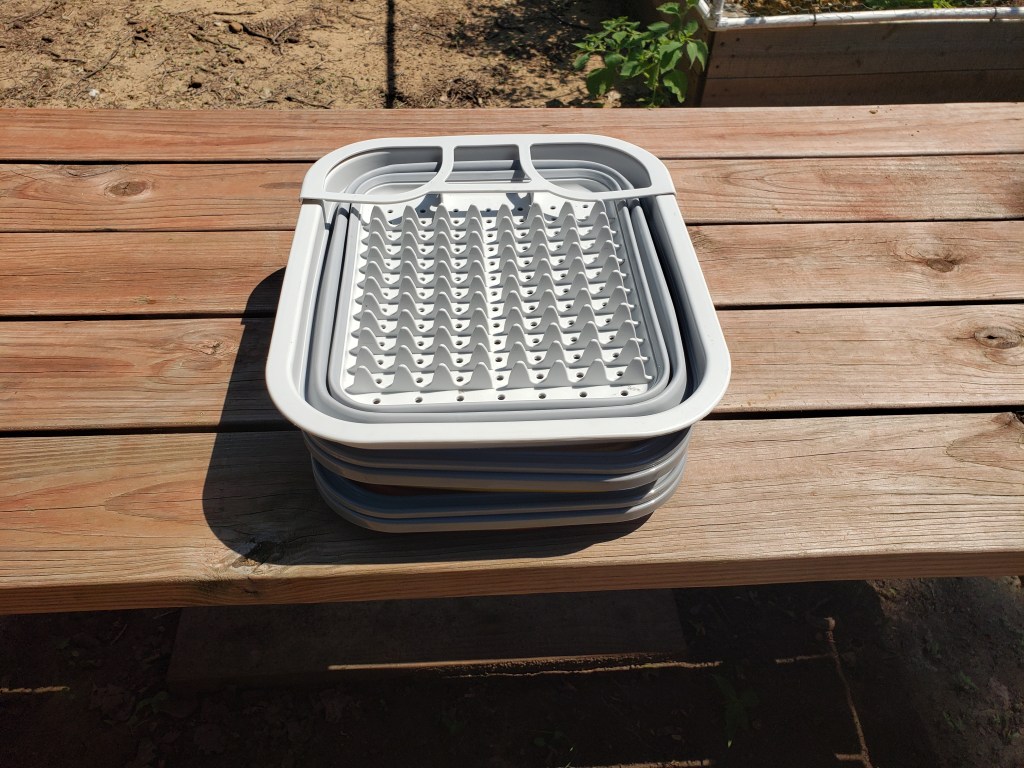
I have been very happy with this pack. Zero complaints so far. I rarely notice it when I’m wearing it and fishing a river. The plastic baits on the right are usually carried in the thigh pocket of my shorts along with a few spare jigheads so I don’t have to dig into the pack very often.
I have no affiliation with Yeti and purchased this with my own money. If anything happened to this one…I wouldn’t hesitate to buy another.
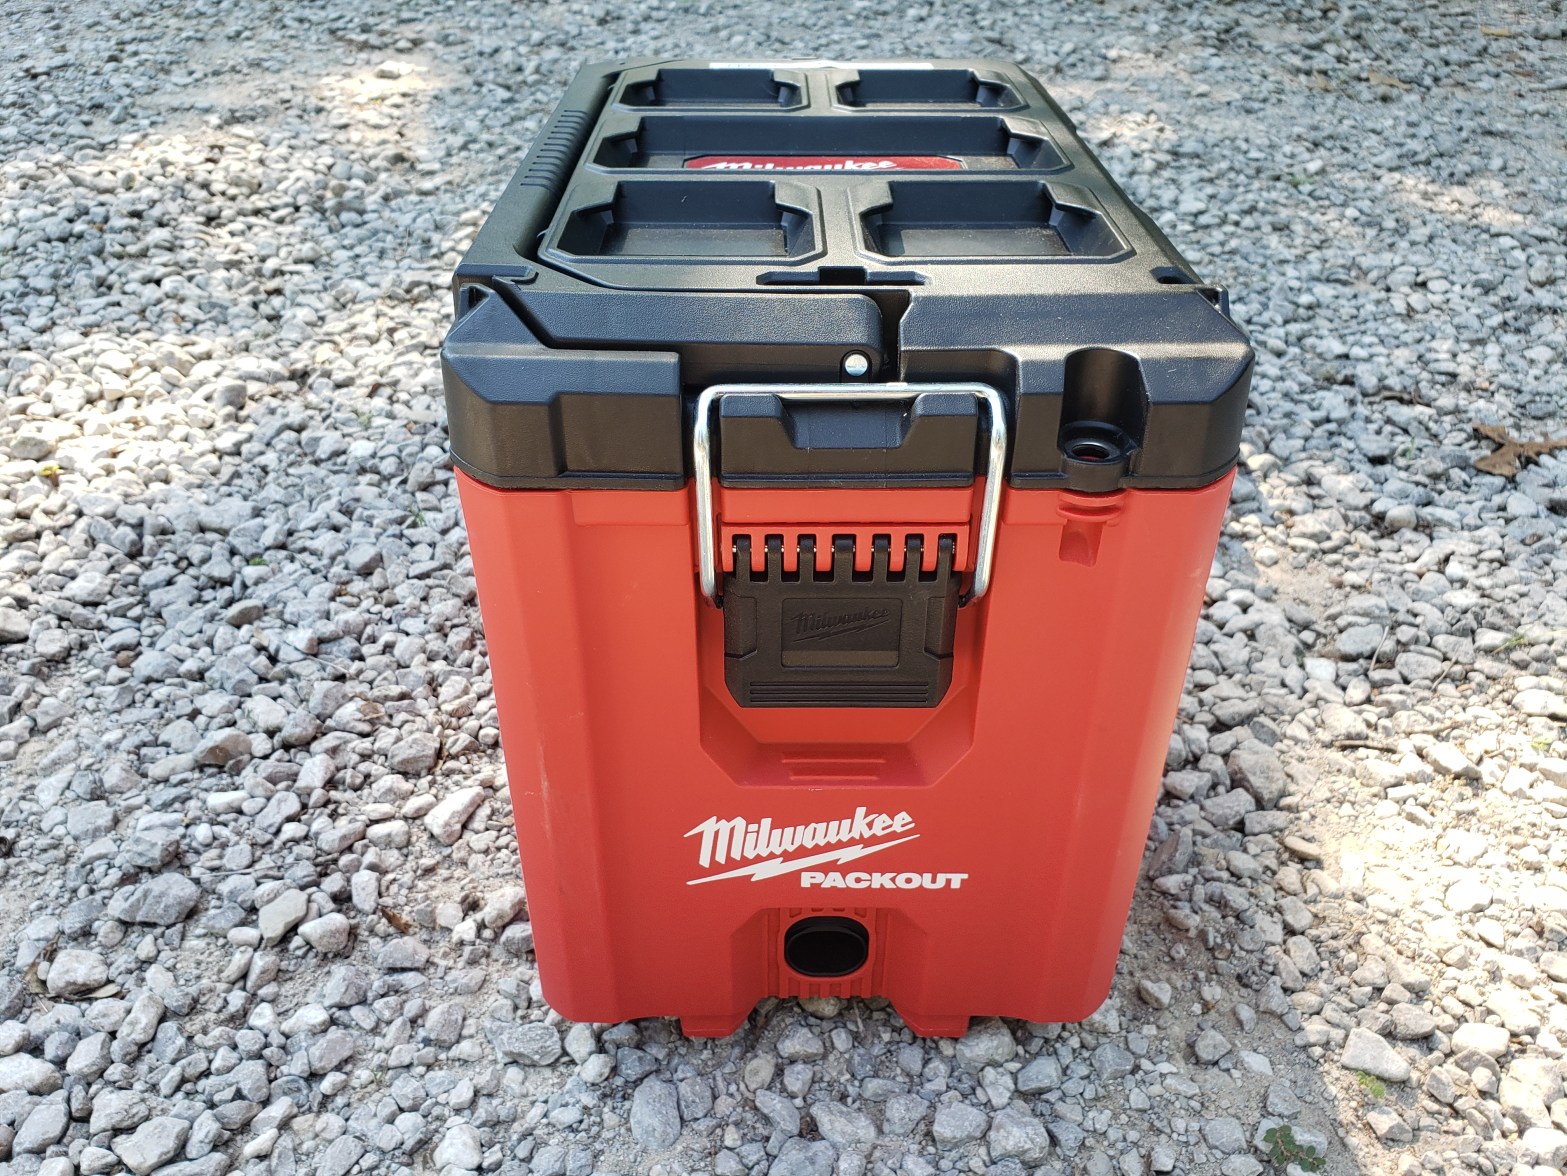
Yes, we used Milwaukee Packout Toolboxes for our Camp Kitchen as well. Told you we loved these boxes! Look at the “bright side”, the boxes are red so it’s hard to misplace or leave them behind when packing up to leave!

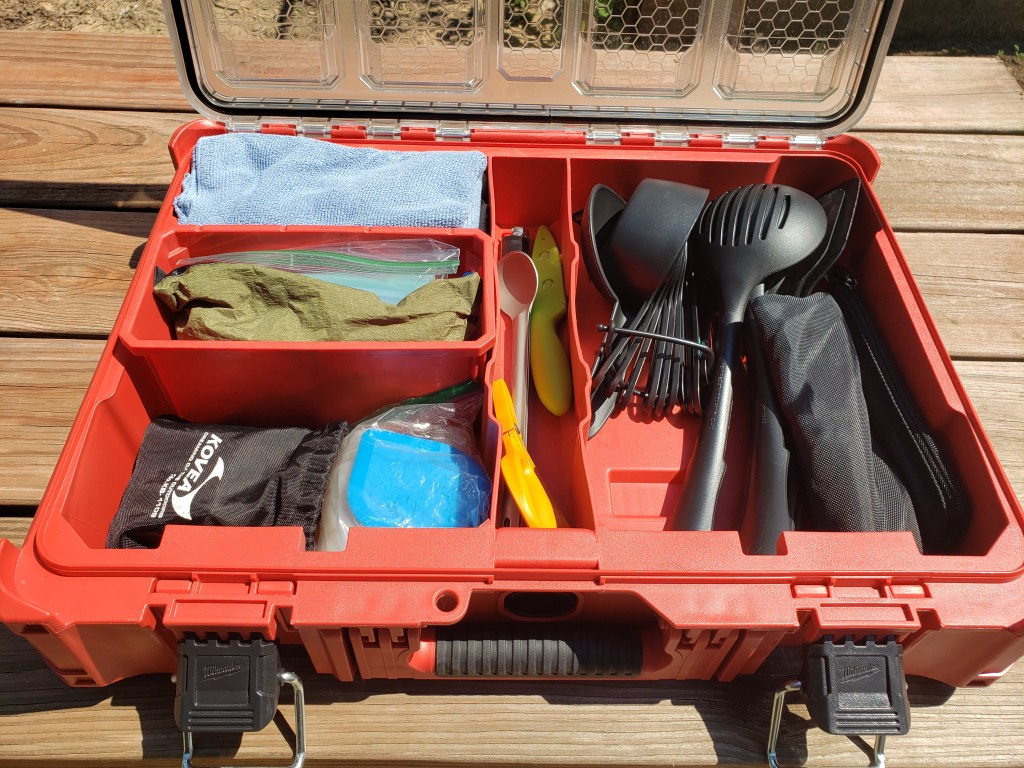

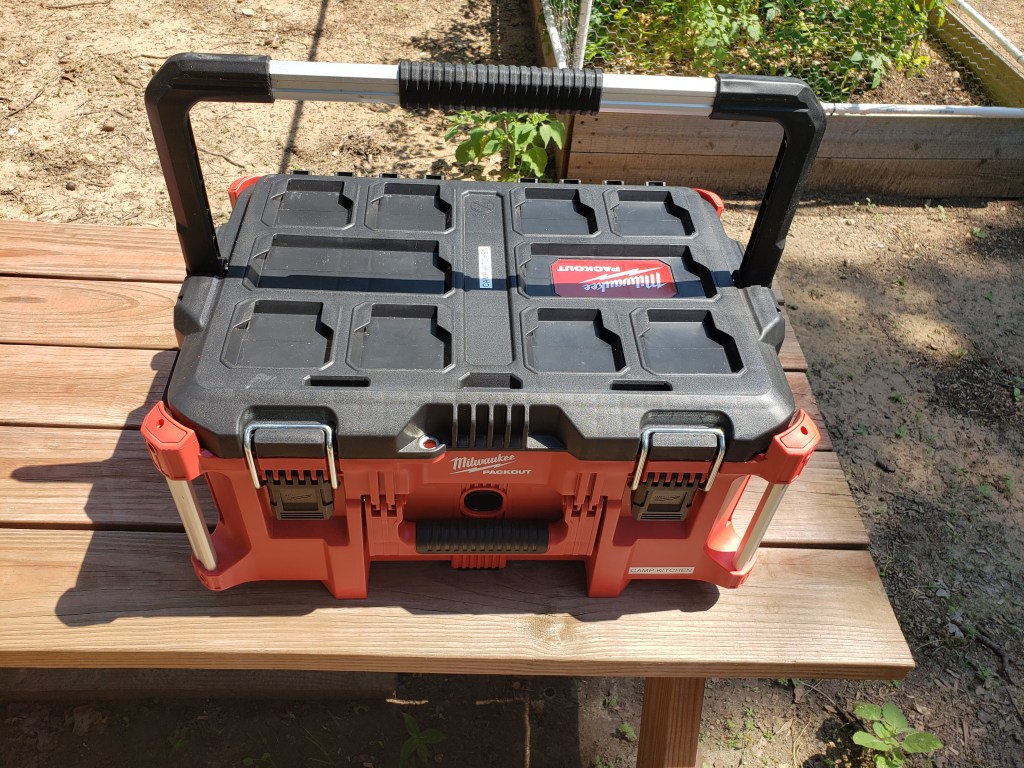
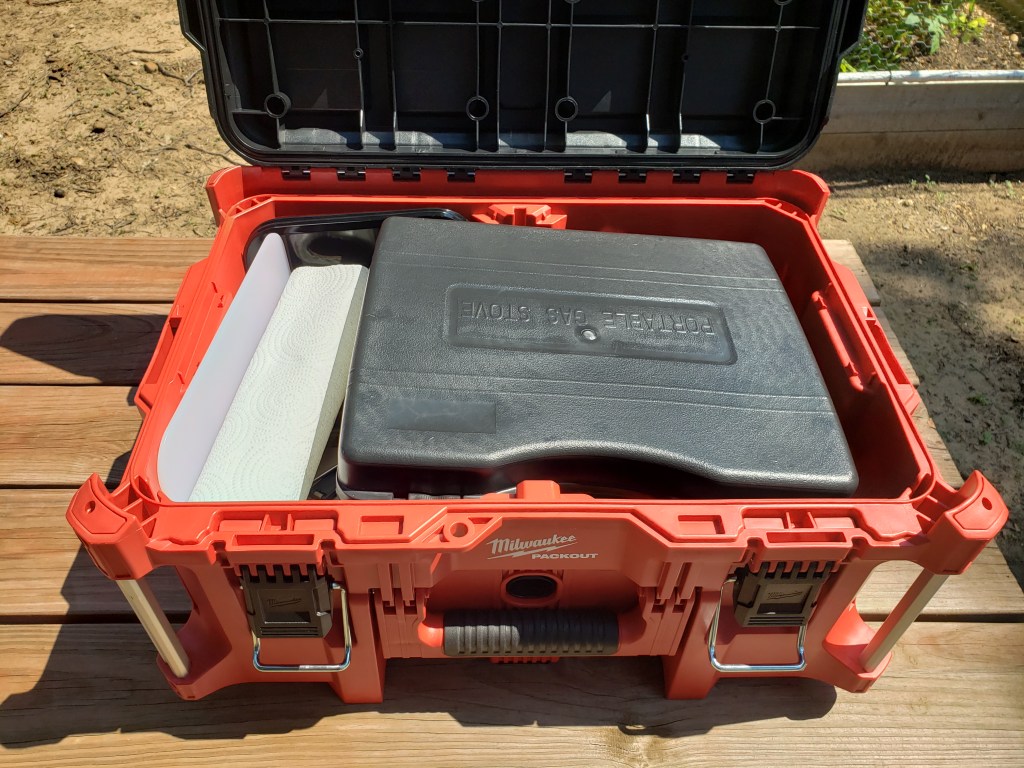


We like the fact that these toolboxes can connect to each other in multiple variations. It really helps keep things together both in camp and during transport. In fact, we stacked all of these boxes on top of one another in the gear room so we know where everything is.
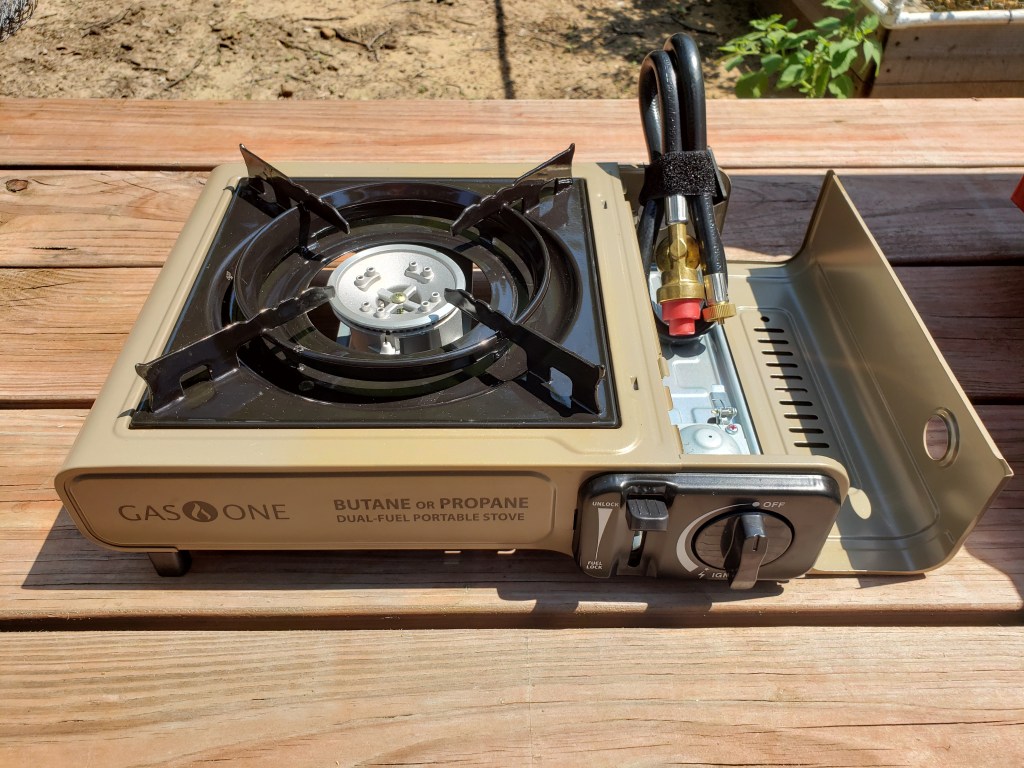
Currently we use the 1 pound Coleman Propane bottles for our camp stove. We are kicking around the idea of getting a small 5 pound propane tank since it’s a cheaper option in the long run.
I had purchased an extra one of these Milwaukee Packout Tool Boxes because I really like the concept behind them. After finishing the Auxiliary Power Supply Box I was sitting there looking at this other box and was wondering if we could store our 1# propane bottles inside. These boxes come with internal dividers so I put them in place and quickly realized that the propane bottles fit perfectly with room to spare.
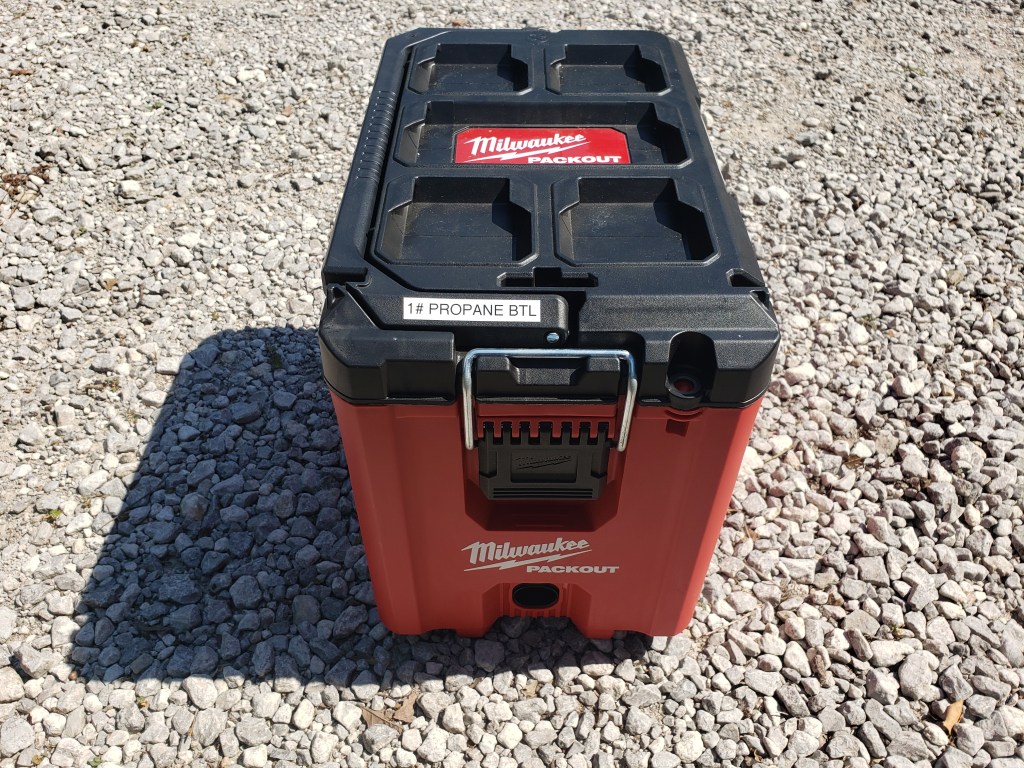


As you can see, there is plenty of room for 5 or 6 of the 1# Coleman Propane bottles as well as a few canisters for our backup backpacking stove (Kovea Spider) and a roll of paper towels.
This little experiment worked well for us. And keeping with the modular approach…it’s easy to transport and keeps the bottles from rolling around or creating clutter by stashing them here and there. By keeping our camping system broken down into separate components it made loading and unloading the vehicle easier for both of us. Before, we used a large Rubbermaid Action Packer to store everything and it was a real pain to get everything to fit and became too heavy for one person to lift.
Food for thought!
Our original plan for this trip was to use a 12VDC refrigerator but bad planning on my part meant if we ordered one it would not arrive in time.
The core of this system is built upon a SOK Battery 12VDC/100A LiFePO4 battery. Yes, it is expensive, but we needed a battery that was rugged, user serviceable and had a depth of discharge that a LiFePO4 battery offers vs a standard 12VDC AGM battery. Our previous 12VDC/100A AGM battery weighed 64 pounds vs 28 pounds for the SOK battery. The SOK is encased in a steel enclosure with a built-in BMS (battery management system) and has 4 replaceable cells inside. I can’t repair a faulty AGM battery.
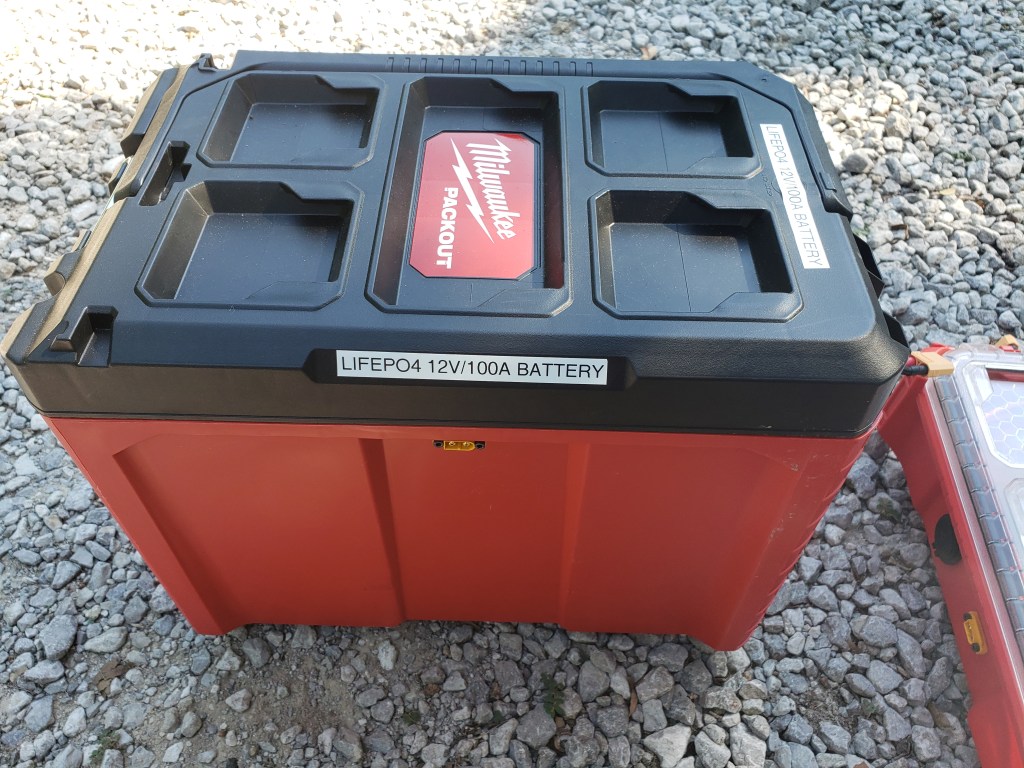


The main benefit for us was a modular approach, lightweight, user serviceable, 80-90% depth of discharge and a rugged build. Not to mention this battery has a 7 year warranty and 4000-8000 charge cycles! 12VDC AGM batteries are heavy and the depth of discharge is commonly quoted at 50% but reading the manufacturers engineering specifications, you will note that a lot of them say that 50% depth of discharge is 12.2 volts.
I am also an amateur radio operator and like to operate in parks and such so I needed the added capability of a bigger battery.
On this trip we brought a laptop to edit photos and videos, the navigation tablet, 2 cell phones and 2 GoPro’s as well as various other USB powered items. I do not like using the main vehicle starting battery to charge things unless the vehicle is being driven so it made sense to bring a separate battery for our charging needs.
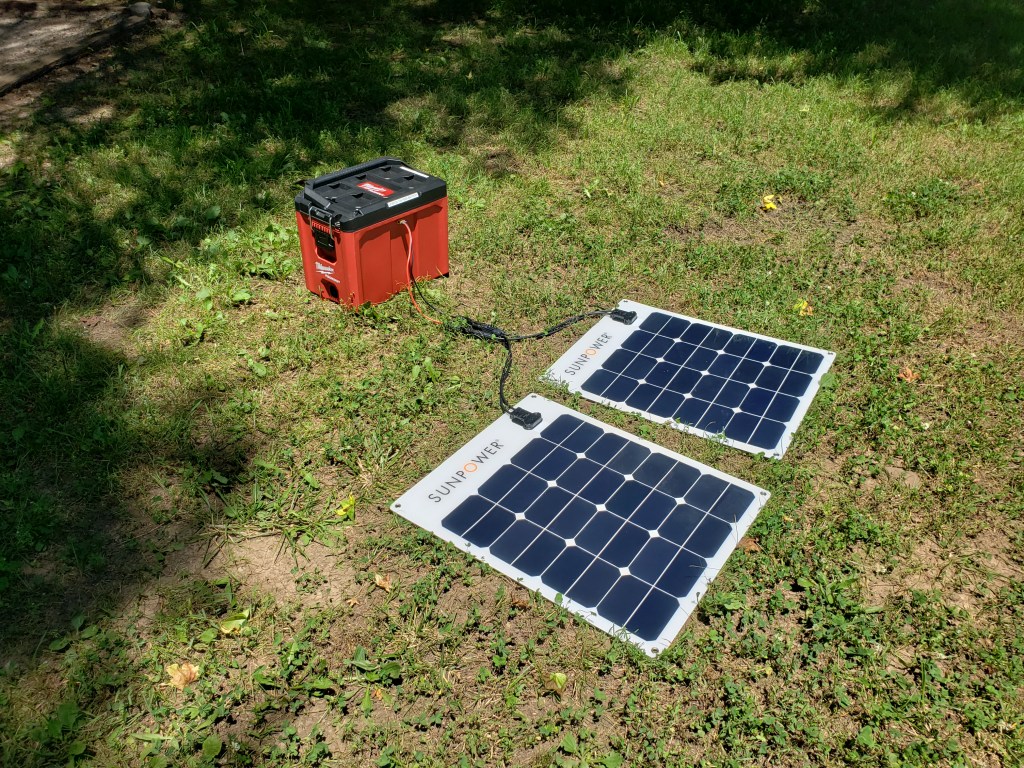

We had all the power we needed or wanted for the duration of the trip. If we decide to get a 12VDC refrigerator in the future I think this battery can handle it.
The battery and breakout box ride behind the passenger seat while the solar panels ride behind the drivers seat. Just like a canoe or kayak, we try to keep the load balanced in the vehicle.
Well, that’s a snap shot of our Auxiliary Power Supply while camping. Maybe it will give you some ideas! Thanks for reading…
I bought these boots for wet wading back in 2018 and fished them hard for the 2018, 2019, 2020 and now the 2021 season. After countless miles the soles have started to delaminate.


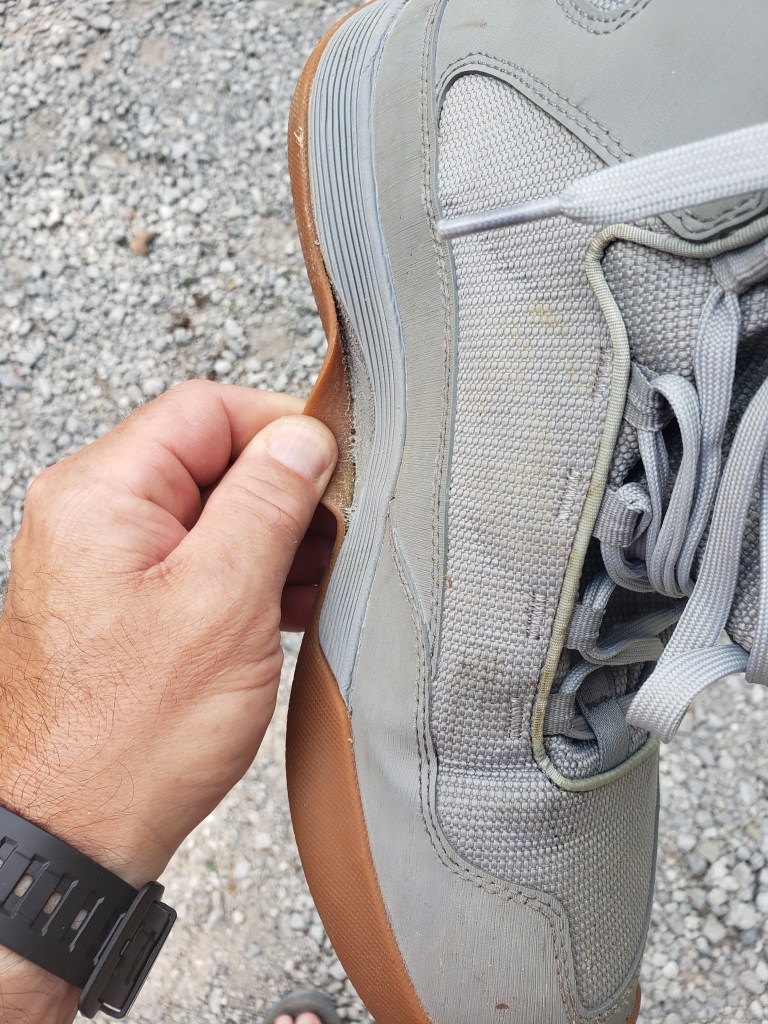
I have looked at buying either the Simms Flyweight boot or the Simms Freesalt boot to replace these. I have used ShoeGoo to fix the heel on the right boot before but it did not hold so I may find a local shoe repair business to see what they can do to fix these. The uppers are holding up really well and the boot is still the most comfortable I’ve worn so I don’t want to give up on these boots or waste money on another pair.
Time to use my Google-Fu and find a local cobbler!
Our 2019 Subaru Forester vehicle. Why did we choose this vehicle? It gets great gas mileage yet still has some capability to it. Yes, I know it’s not 4-wheel drive, I own a Toyota FJ that we use for trips that require that! However, the Forester has decent cargo capacity and within its limits, can handle a lot of what we do.
First major upgrade was a set of Falken Wildpeak A/T tires. Everyone said to go with the BF Goodrich KO2’s but they were way too heavy for my taste. I would’ve added about 90 pounds to the vehicles unsprung weight capability and since the engine only produces 182hp I looked for a lighter tire that was still functional and wouldn’t put as much strain on the drive train. With these tires, handling was improved yet road resistance was minimally affected.

Next up was a decent set of rims. Sorry Subaru…you make ugly rims!!! We opted for the Method MR502’s since they checked all of the boxes on our wish list. These rims are rock solid and I must say, they make the Subaru look A LOT better.
Since our Subaru Forester was a base model, I had to add a 12VDC outlet and USB 3.0 ports on the rear of the center console to provide charging capabilities while we are on the road. I repurposed a Lenovo Tablet for navigation duty and paid for the GaiaGPS app. The Lenovo M10 FHD tablet stays plugged into the USB 3.0 port on the rear of the center console all the time and allows us to charge our phones from the front two USB ports on the dash.

Fully loaded for our recent trip, you can see a little bit of saggy butt which is common for Subaru’s. We will address that at a future date. I installed a rear tow hitch and receiver in case we add a swing out tire carrier in the future. The roof rack looks cool but we don’t really use it other than to haul a spare tire or something. It decreases gas mileage by an estimated 3mpg so we may take it off.
The final modification was to add a 20 inch LED lightbar to the front for additional lighting. Since we were leaving our campsites really early, the lighting helped tremendously on the forest roads in the early morning.
I wish I had a legitimate E-brake rather than this push button crap but the Crosstrek was too small for our needs. The only other negative is the EyeSight Car Safety System.. it’s annoying! It feels like R2-D2 is riding along with us…beeping, chiming, chirping. Maybe we’ll get used to it. Some of the features you can turn off, others you really can’t.
Other than that, it performed really well (better than I expected) on the trip and handled some rugged, rocky forest roads with ease. We made it from the Cossatot River all the way home via the scenic route and still had a little less than half a tank of gas left.
As a parting picture…this is what the back-end looked like inside…

More to come…
After a lot of trial and error, I decided to go back to a fly fishing vest for the times when I am fly fishing. I know it probably “isn’t cool” in 2021 but I don’t care. It works better for me than anything else I have tried.
Speaking of trial and error…I tried a hip pack but got tired of dealing with the zipper. I tried a sling pack and the result was about the same. I also tried a chest pack and it was too awkward for me. Besides, I couldn’t see well enough when I needed to watch my foot placement when crossing a stream. So, I decided a fly vest was my best option.
I chose the Patagonia Convertible Fly Fishing Vest because A) it was minimalist (I don’t need 50 pockets) and B) was mesh fabric based. And since it hits the 100’s F every summer, I opted for something a little cooler than the other options I found.
In all honesty, I haven’t fished with it enough to give my thoughts or opinions on it yet. But so far I think it will fit the bill. Stayed tuned for an update on it…