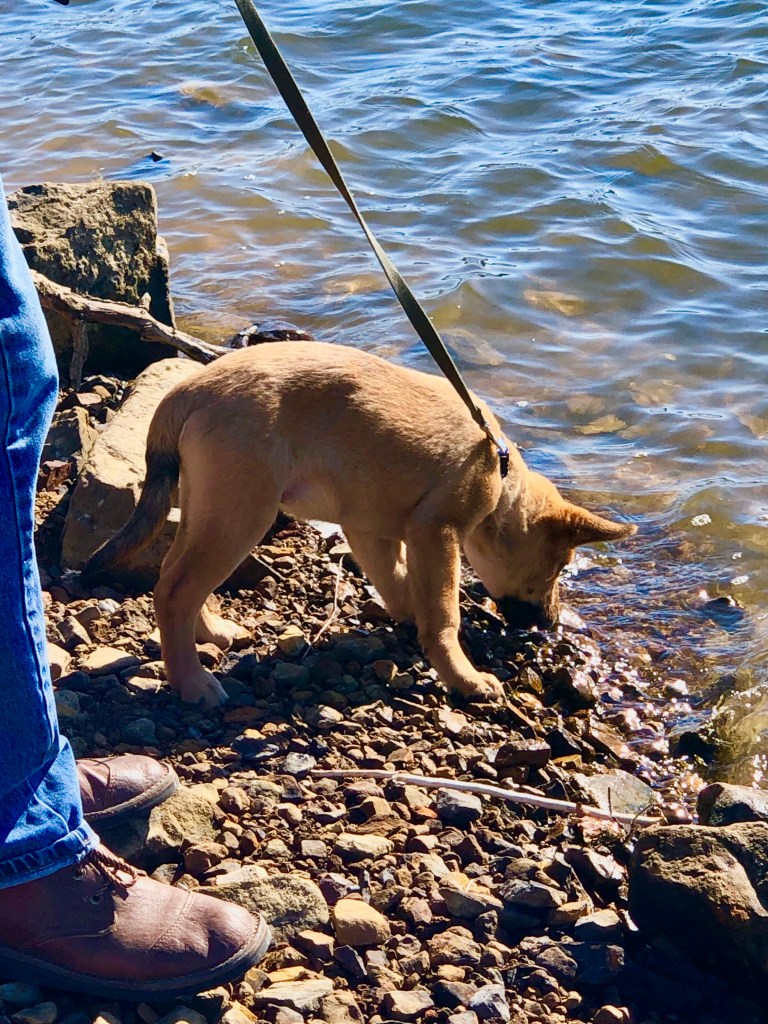
With the weather being really nice this weekend we opted to work with Zip on traveling by car. He still gets car sick so we have started taking really short trips with him. He has never seen a pond or lake before so we decided to begin there.
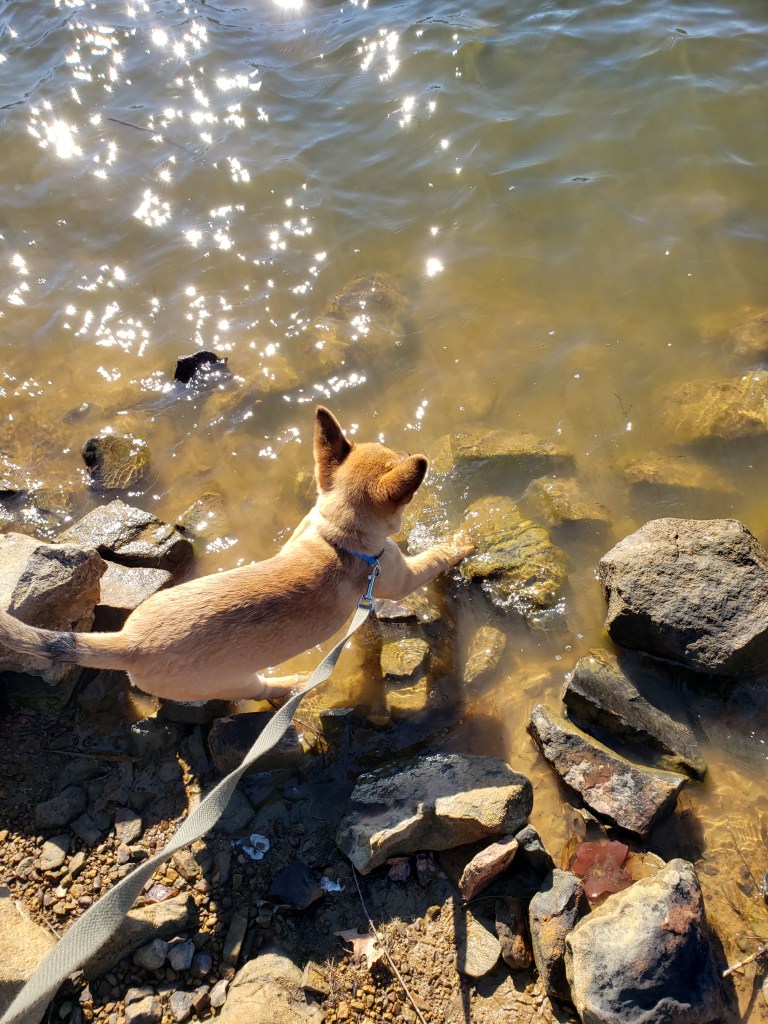
He’s definitely not afraid of the water.
Also, we are still working on the basic commands and he is responding well. He likes to explore his environment so he and I will get along great.
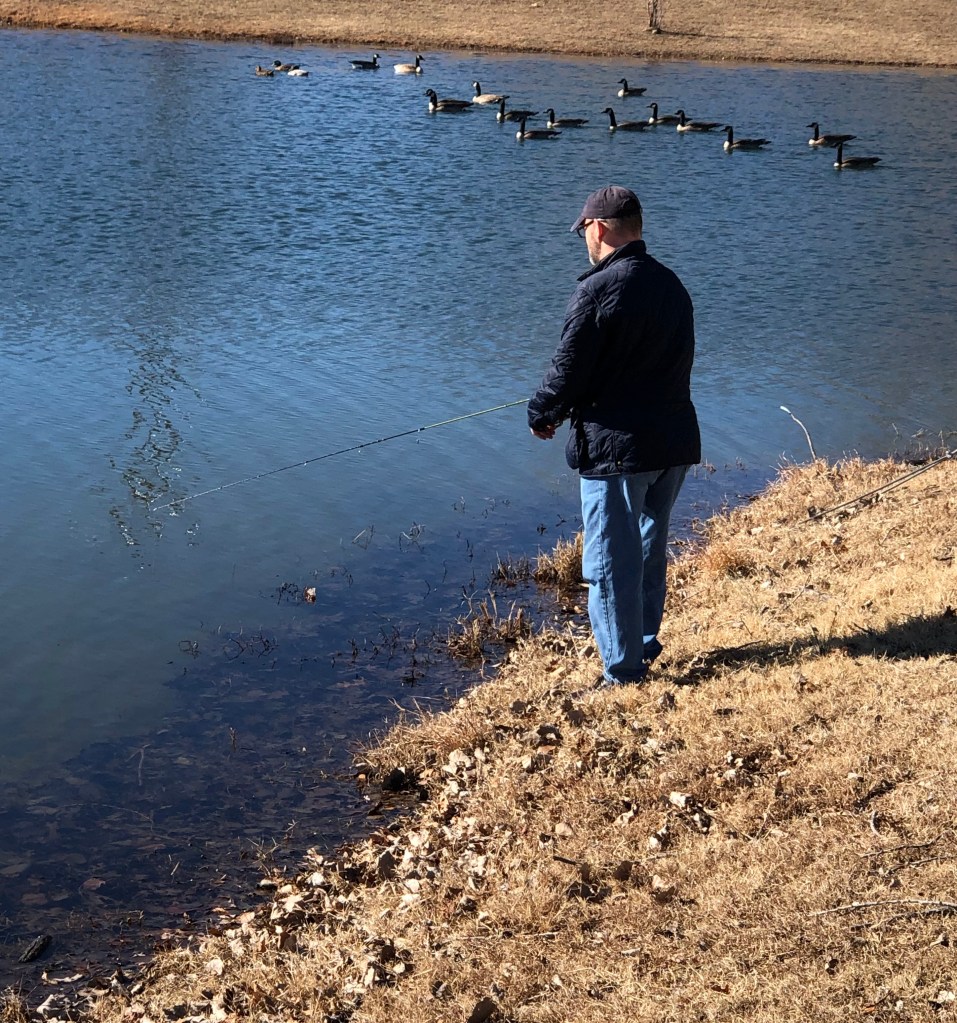
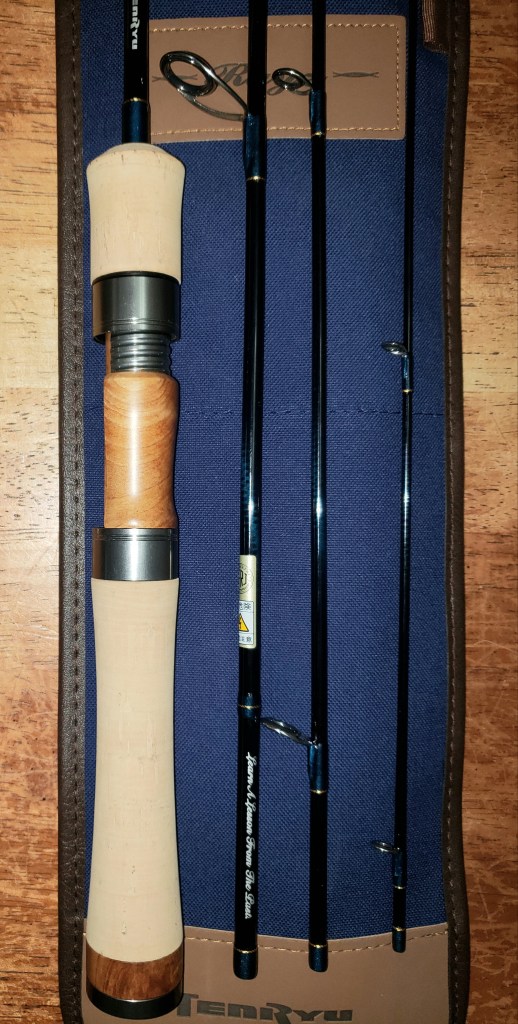
And it would be silly of us not to fish while we were at these lakes and ponds. My wife finally tried out her TenRyu Rayz Integral RZI50UL-4piece rod. She liked it and stated that it didn’t cast as far as some of her other rods but would make a good creek fishing rod. I cast it a few times and concur with her assessment. Definitely not a long-range casting rod.
Watching her test the TenRyu rod.
It has been a relaxing weekend so far. Zip is curled up at my feet as I type this blog post. The weather will be taking a drastic turn soon. It is slated to be 71F later today but we have ice and snow as well as 5F temperatures moving in soon. We try to enjoy nice weather while we can. Stay safe out there…
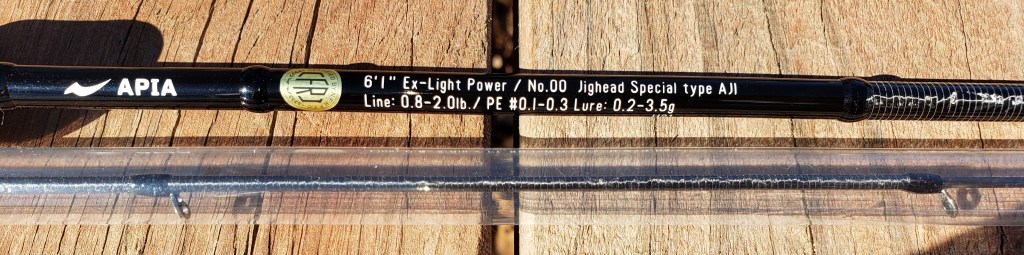
This is an Ajing (Horse Mackerel) rod and as such is relatively stiff. I ran across this rod while looking at UL Saltwater rods and decided to give it a shot. If you remember, my TenRyu Lunakia rod is also a similar rod. There are a couple of categories besides Trout that I look at such as Rockfish, Light Game and Ultralight Saltwater rods.
When it arrived and I removed it from its zippered case and put it together, I was concerned that it might be too stiff. After casting it for over an hour I can say that it is fine and casts a long ways. I’d put it right there with the TenRyu Lunakia as far as casting distance.
What drew me to this rod was the reel seat. As you know, I prefer minimalist style reel seats. The fact that it weighs 56.5 grams was another factor. It does have a solid tip for the last 3 rod guides and that tip is very thin.
SpecsThe knurled ring on the screw down reel seat is metal. Handle is very firm EVA foam.My preferred style of handle.Shot of the included protective cover for the tip. Another shot of the tip protector. Partitioned zippered rod sleeve.
I can definitely see myself using this rod a lot. I paired it with the Shimano Vanford 1000 and it balanced nicely. The Vanford is loaded with 6lb Daiwa J-braid which created a lot of noise throughout the rod. I will more than likely respool the Vanford with nylon line soon. Some Japanese rods are line specific…nylon, ester, fluorocarbon and braid. Something to be aware of when looking at JDM rods. This rod was an absolute joy to cast and even using a 2 gram trout spoon, I could feel the lure flutter as it was retrieved. To say I am impressed with this rod is an understatement!
Apia (Anglers Utopia) makes a wide range of rods in the Grandage series. I noticed they make the Grandage Lite in a 6ft 8in 5 piece rod too. Hmm…..
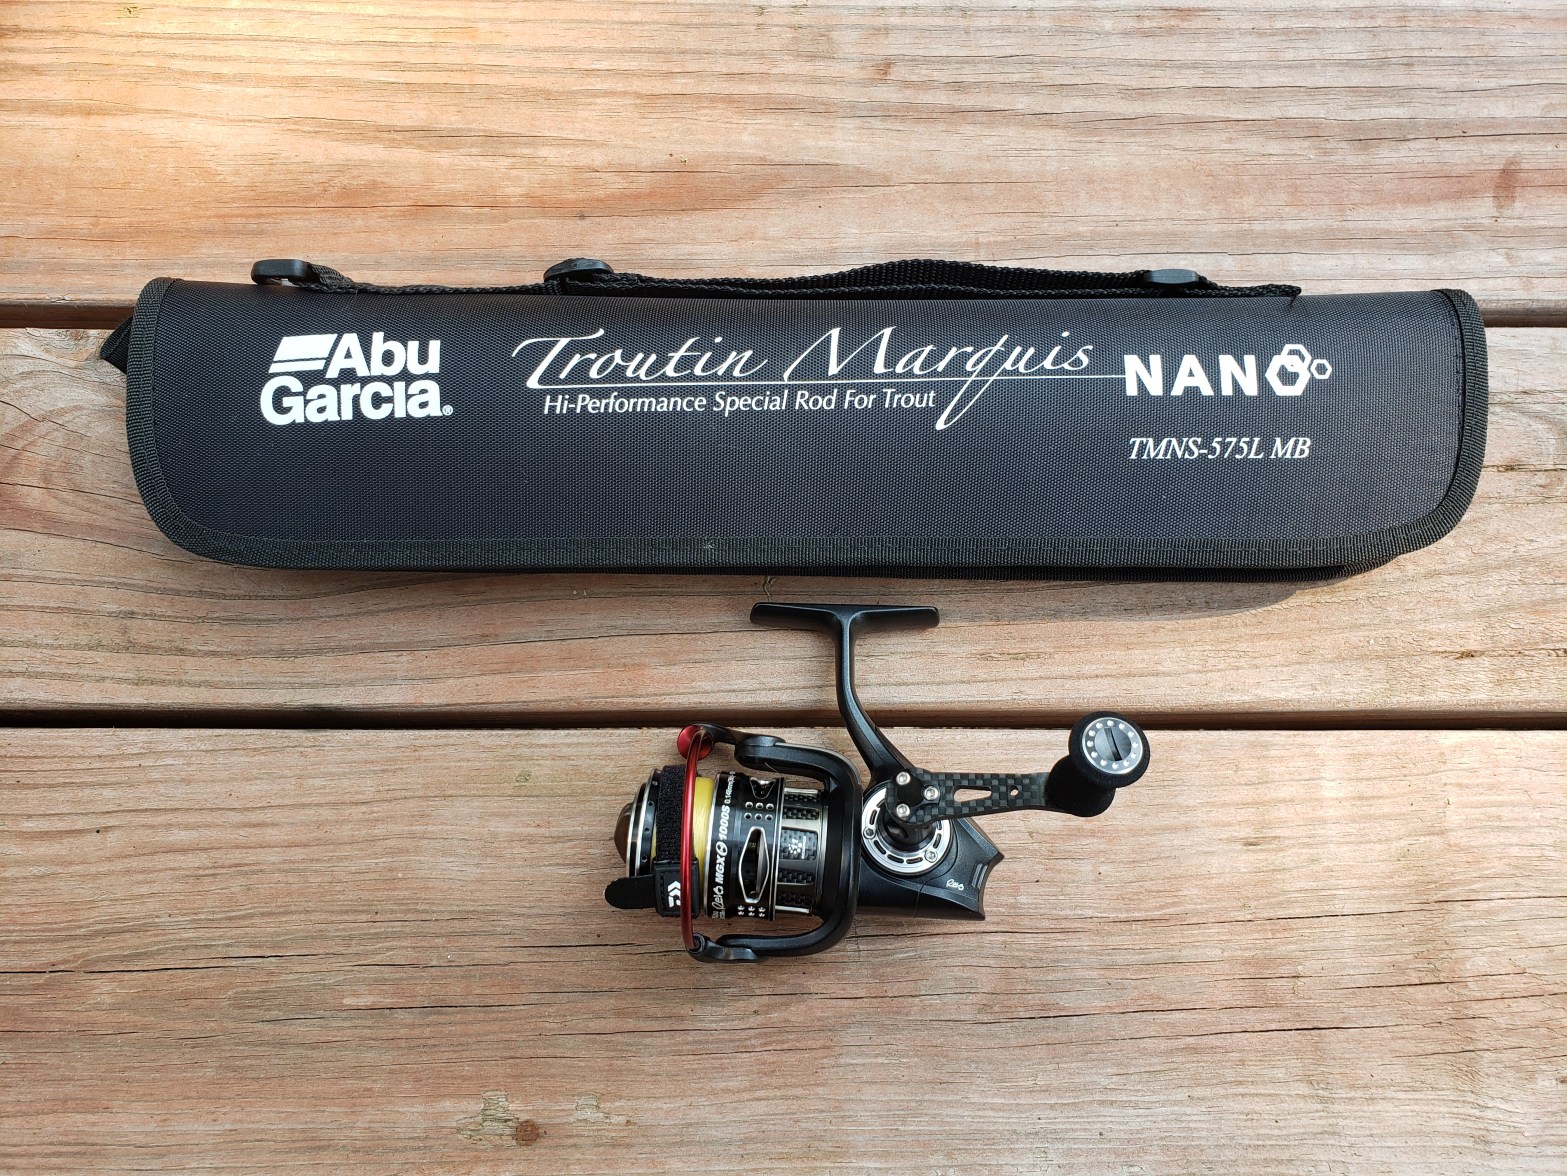
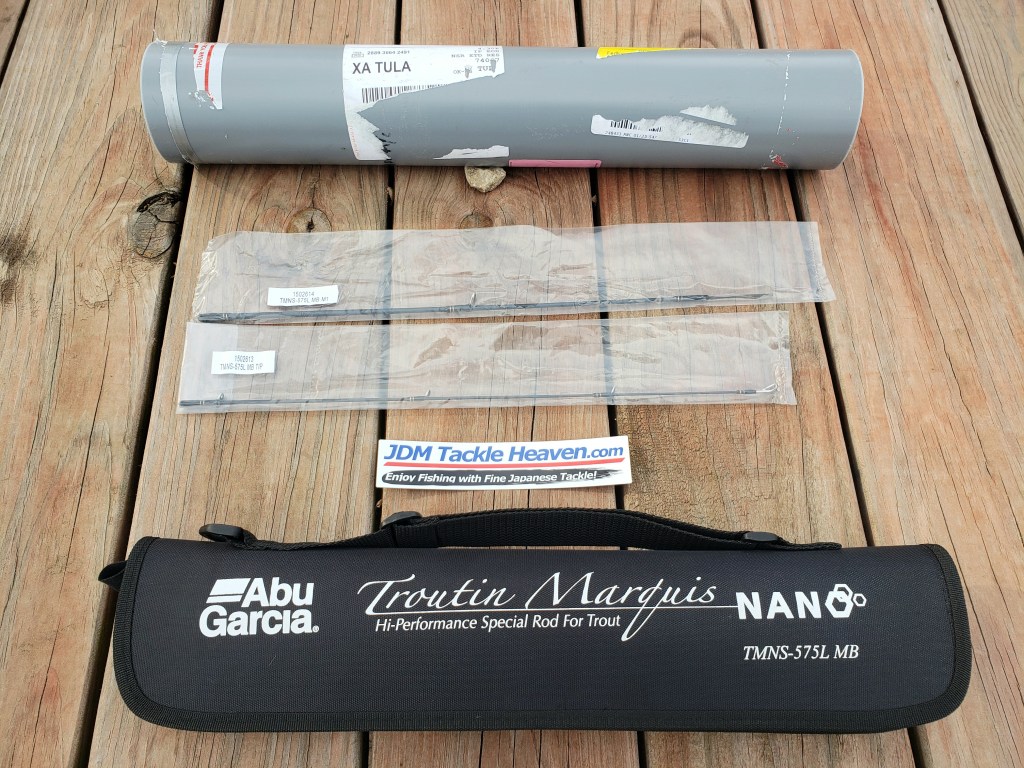
They’re here and my rod is complete again. I’ve been waiting impatiently ever since I received shipping confirmation.
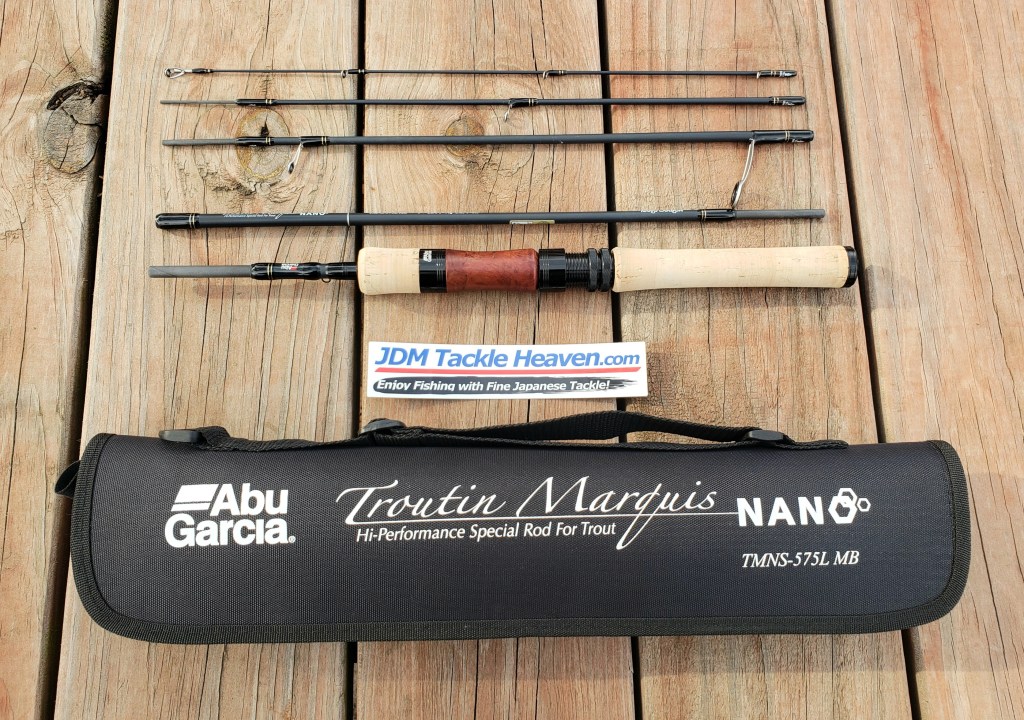
Shipped in an 18 inch PVC tube. Padding not shown!2 Replacement sections.Complete rod and case. For reference: the handle section is 14.75 inches.
Since I spent a large portion of today running errands and getting chores done, I plan on going fishing tomorrow. Supposedly the local trout pond was restocked this morning so I plan on heading there tomorrow morning.
If all goes well and the weather holds…I have a surprise for tomorrow. Thanks for reading.
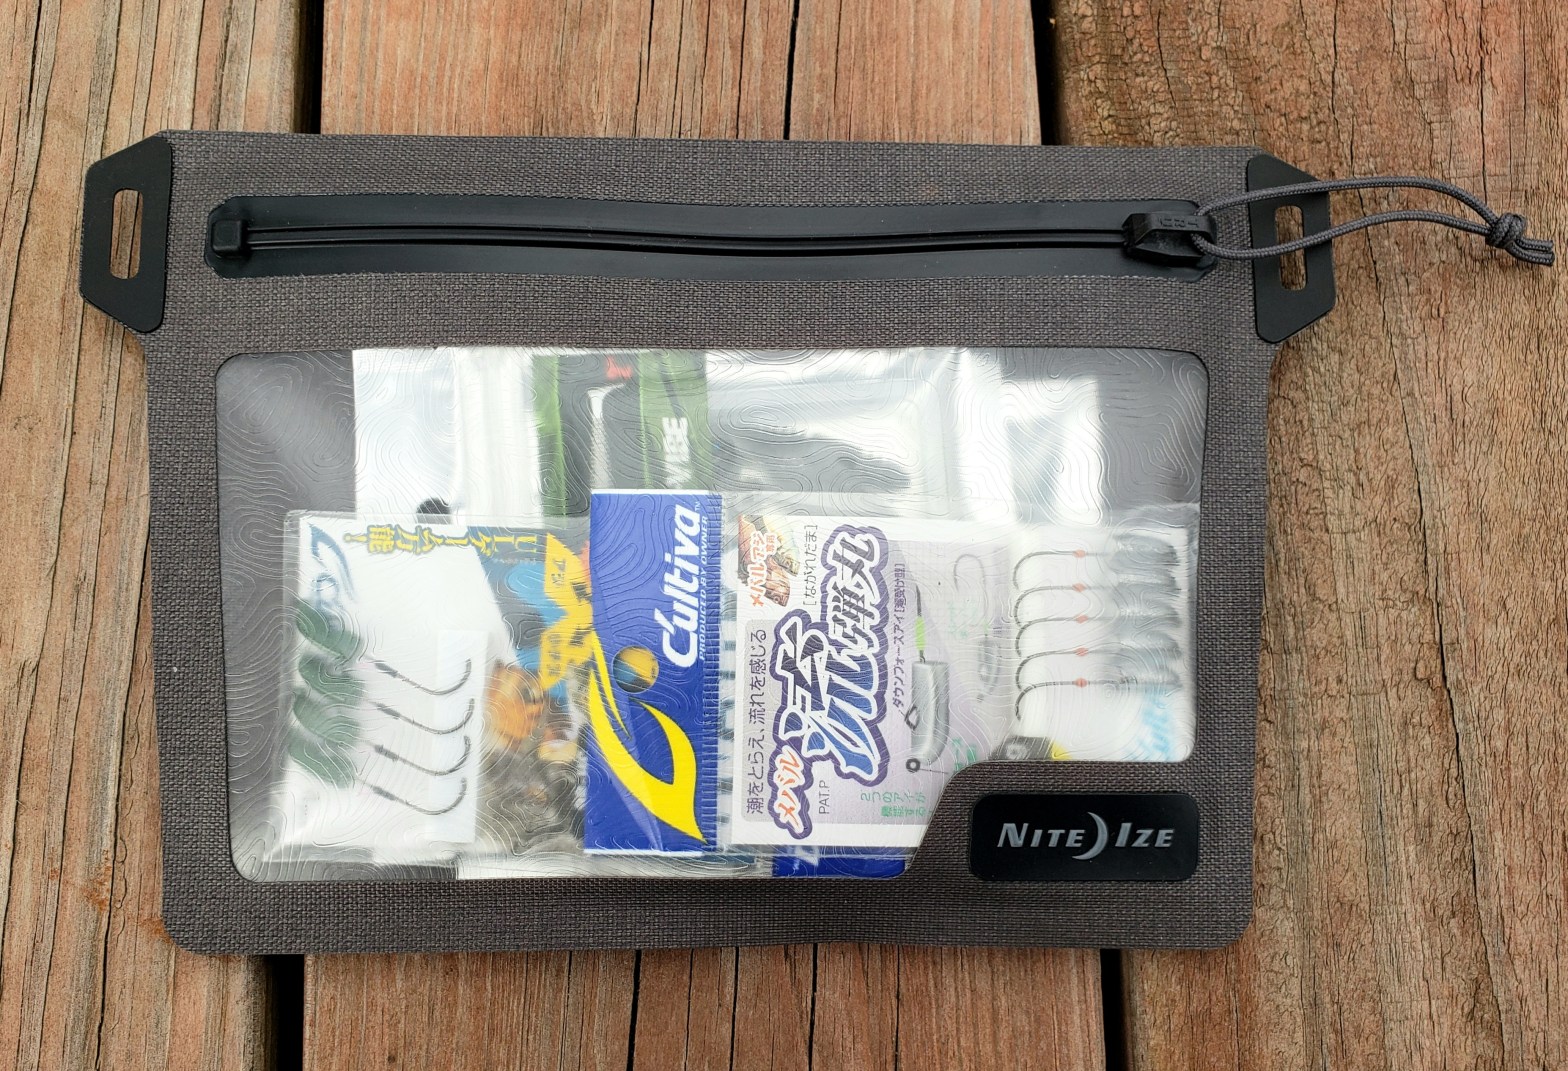
Something I wanted to try for the 2022 fishing season was the NiteIze Runoff Pouch. There were times when we hit the river/stream with only a few jigheads and a package or two of plastics. This little pouch will fit the bill. Waterproof TruZip zipper and IP67 rated to 1 meter should suffice for us.
Single belt loop.Just the basics.With room to spare.
I think this might work really well. It’s thin and unobtrusive. This waterproof zipper is a lot easier than the TiZip on the Yeti Panga and Patagonia Stormfront slingpack. I may just make a little 1/2 inch webbing belt for it instead of using the single belt loop on the back. I think that would keep it from sliding around better.
An issue we had last year was waterlogged packages of plastics and some corrosion on the jigheads. This will alleviate that. I prefer to keep my most used lures such as these readily accessible.
Can’t wait for Spring to fully test this idea out…
So many rods and reels…so little money. Being a curious person by nature isn’t helpful at times. With the multitude of technological advancements happening in the fishing industry, it is difficult to choose that ONE rod that does it all. It doesn’t exist and never will. I know this and yet I keep fighting it and keep searching for the perfect setup.
Honestly, I could spend weeks just doing research and refining my needs and wants…but that doesn’t catch fish. But with all of the “Graphite Wizardry” coming out of Japan, It’s hard to settle on one rod anyway. In a land of specialization and variety, the choices are endless. And that doesn’t help my cause. The concept of “perfection” is very subjective anyway.
And as I learn more about JDM fishing rods, the wider and deeper the “rabbit hole” gets. Area Trout, Native Trout, Ajing, Mebaru, Rockfish, Light Game etc etc equals more options, more decisions. Factor in lanquage translation and videos, for an outsider, it appears to be an obsession.
I plan on doing a group photo of all all the JDM rods we have, which might be a bit disconcerting once we actually have them layed out. The plus side is that we do use every single one of them. And we haven’t bought a bad rod yet, which is nice. How’s that for rationalization?
And I will state emphatically that this gear has definitely made our fishing better both in catch-rate and fun. And I haven’t even started looking at Japanese made fly rods! Hmm…Beware the Rabbit Hole!
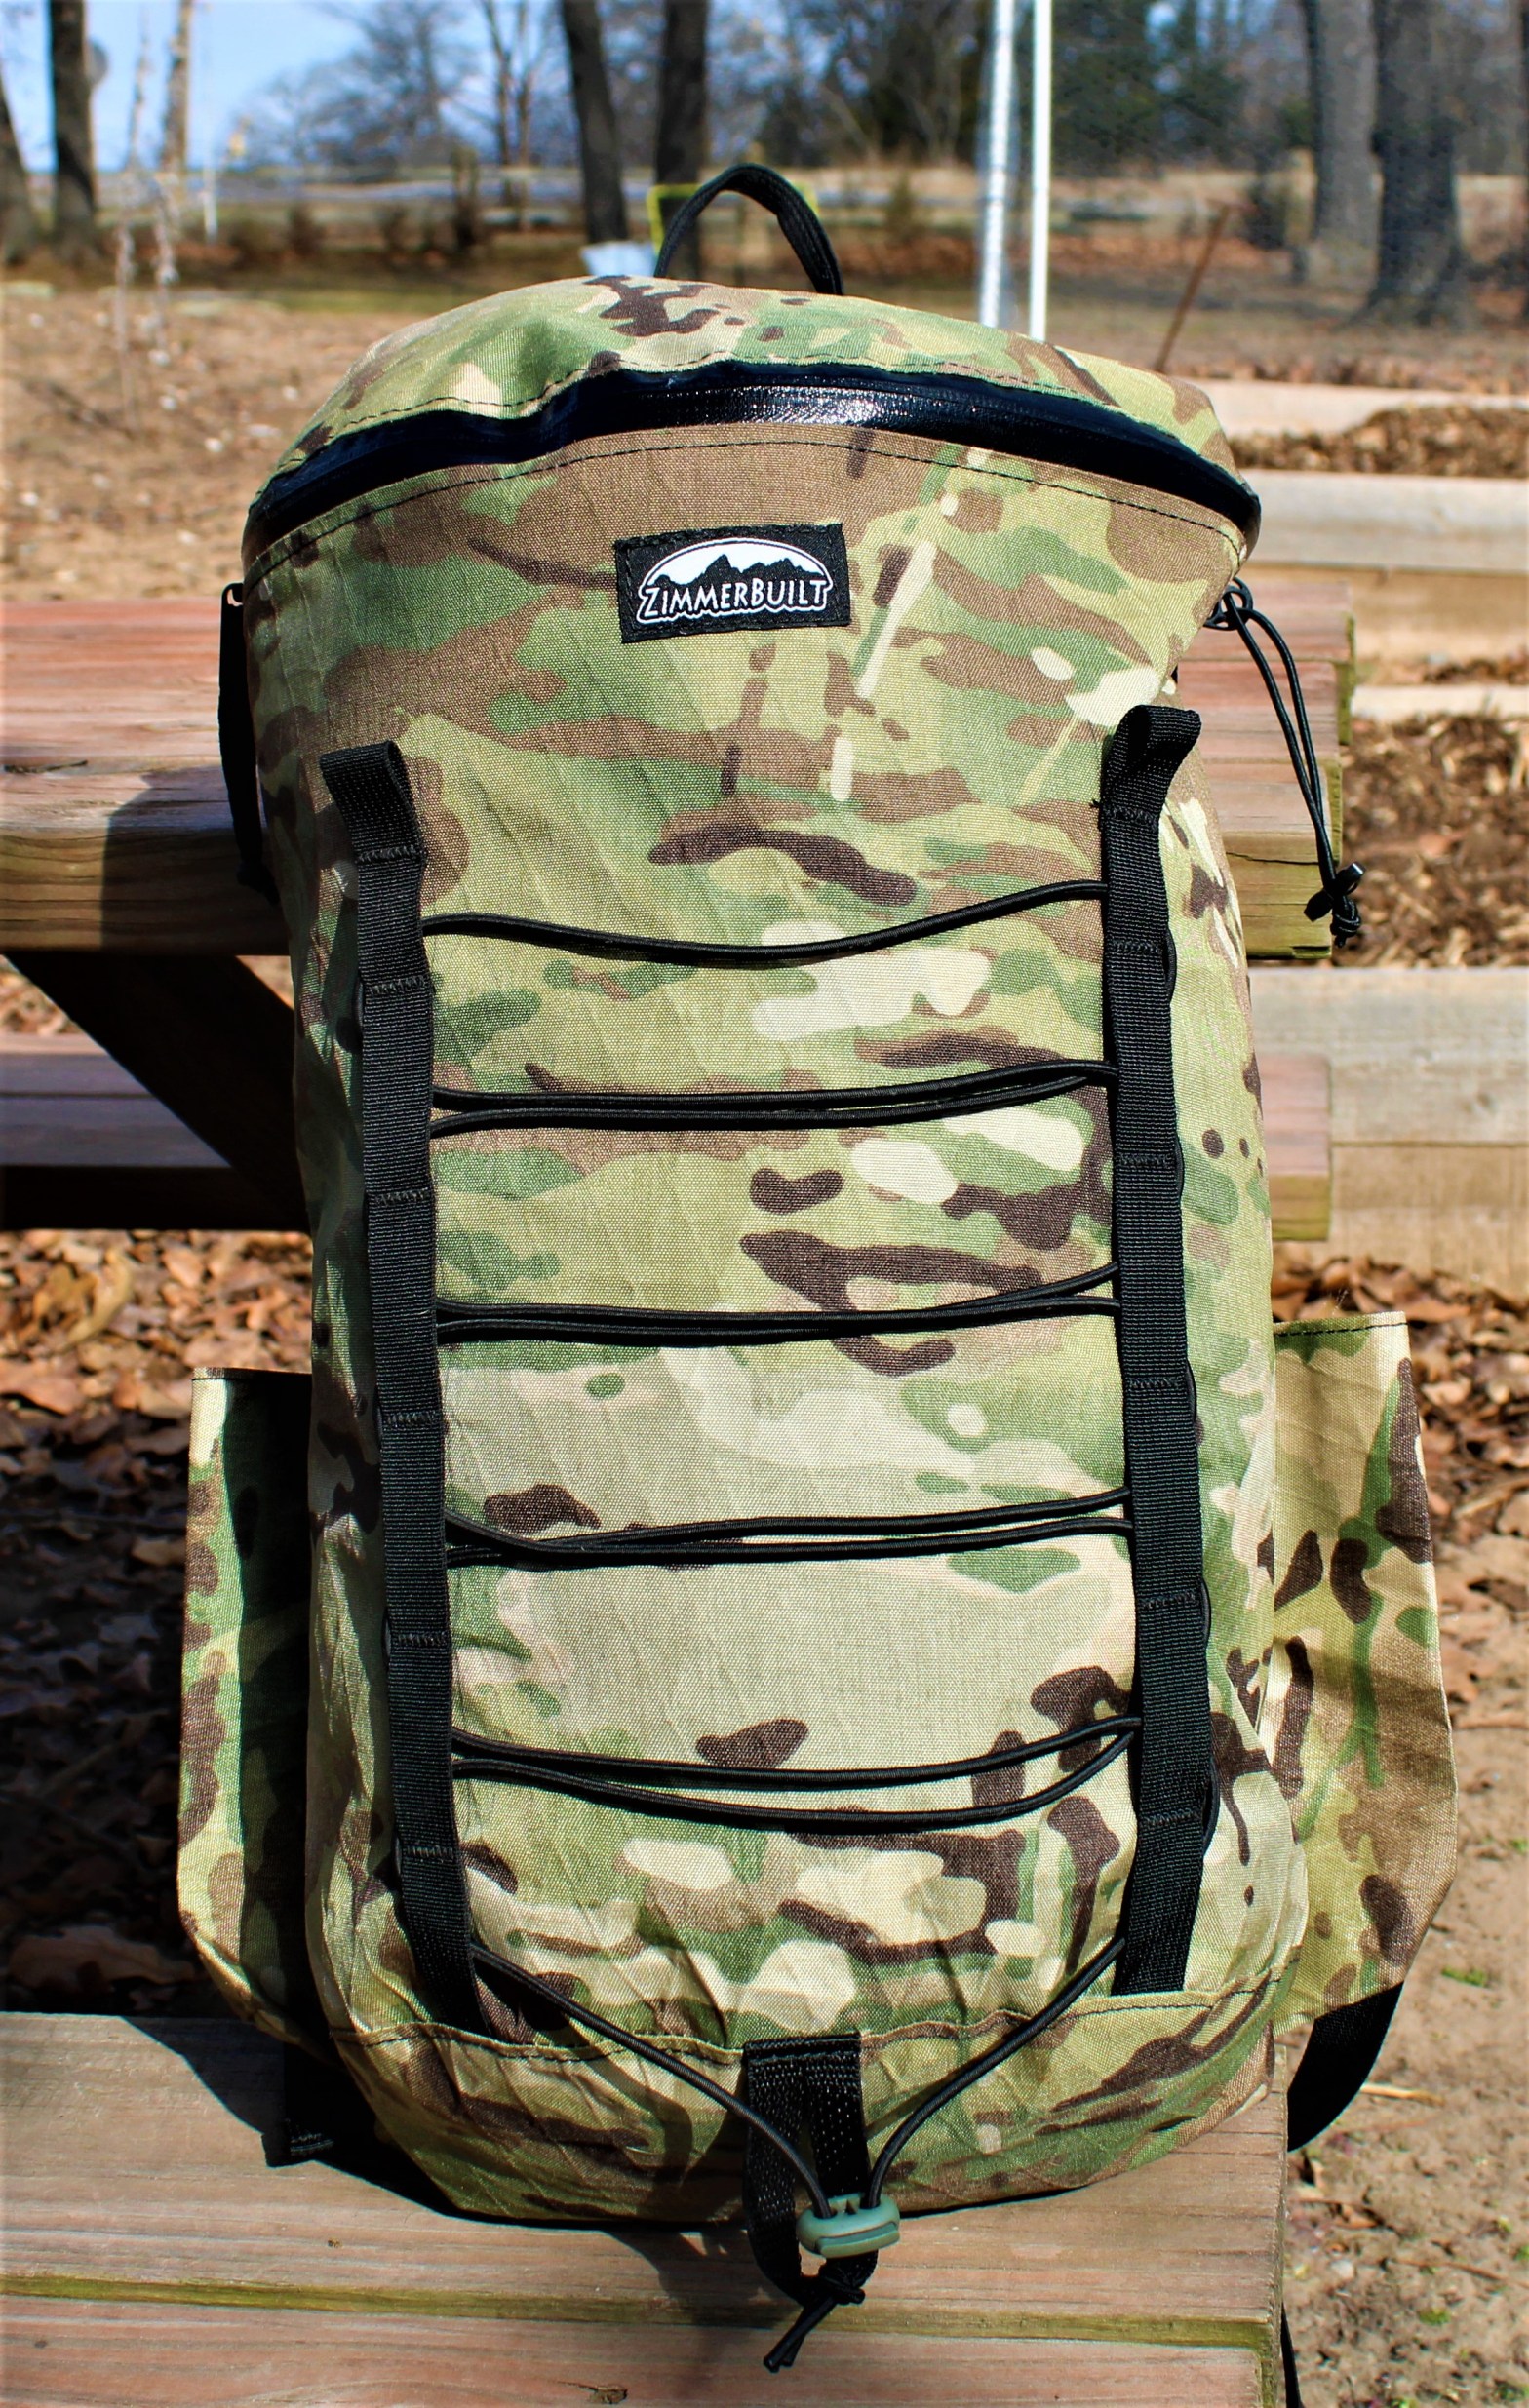
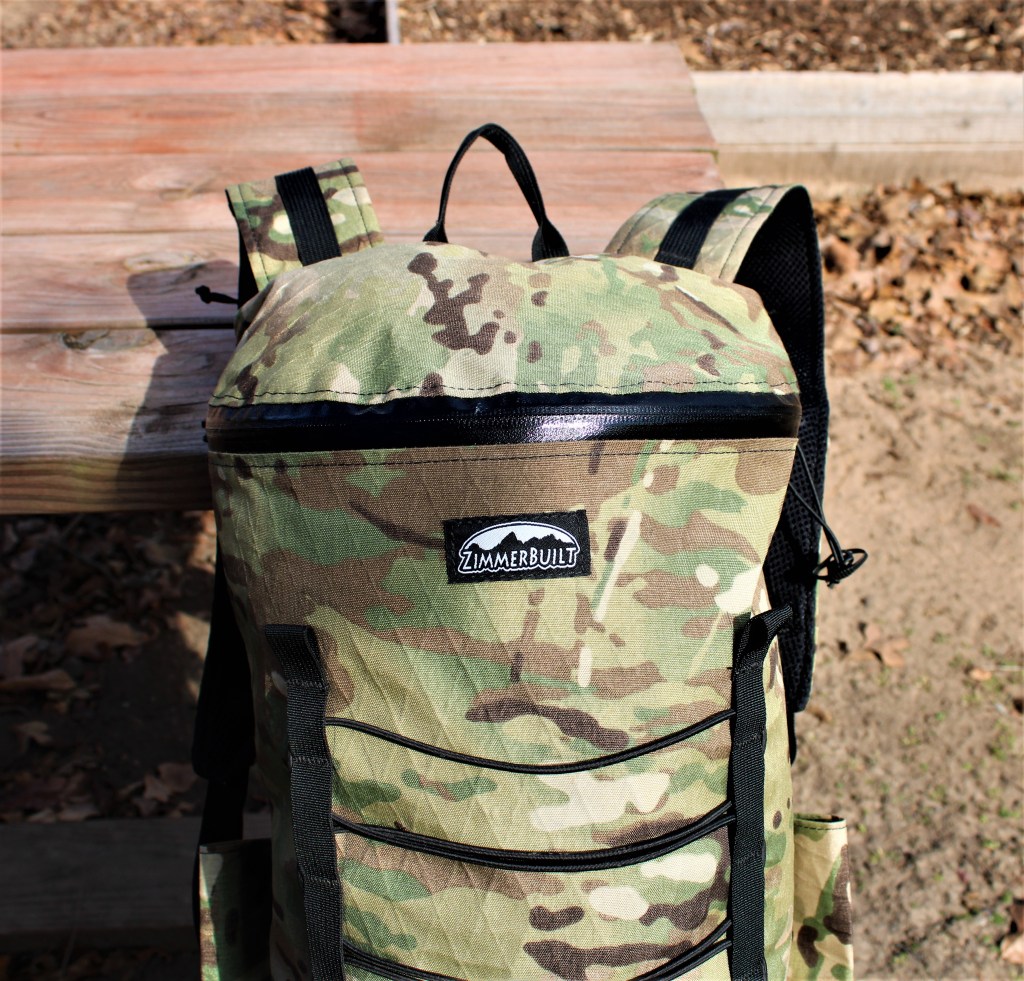
I purchased this pack several years ago to use when fishing streams. You can find it on their website http://www.zimmerbuilt.com under “Tenkara Gear.”
Specifications:
-VX-21 fabric
-Capacity: 1300 cu in.
-Height: 19.5 in tall
-Width: 11 in at the top and 10 in at the bottom
-Depth: 6.5 in
-2 external Tenkara rod holders with shock cord retainers up top.
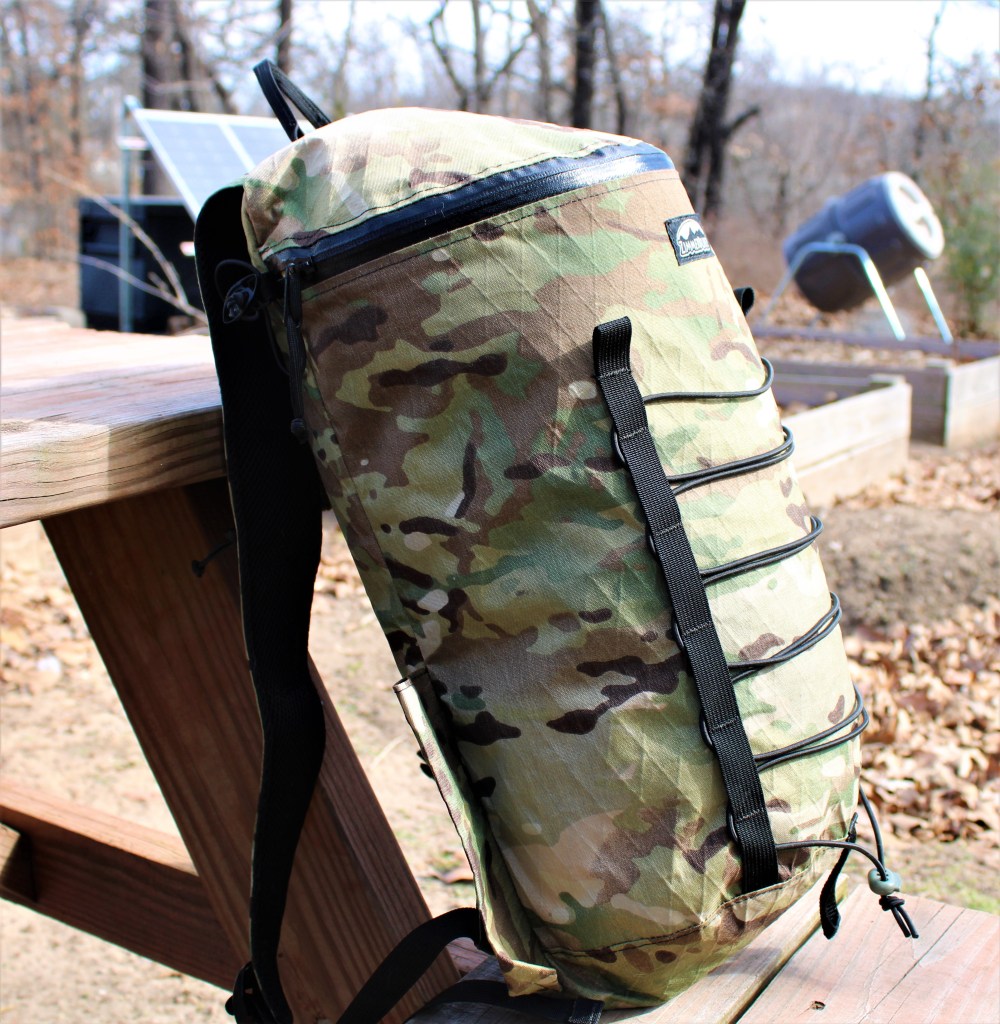
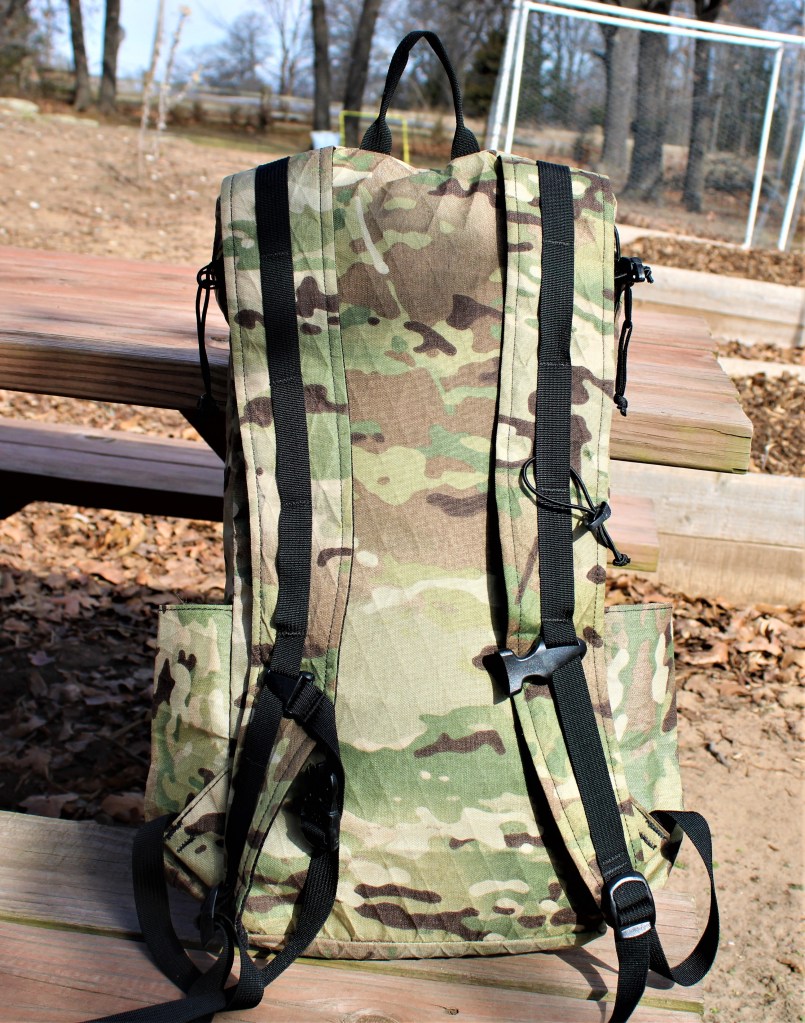
Dual Daisy Chains with Shock Cord.Simple shoulder straps with sternum strap.Single zipper, top-loading design.
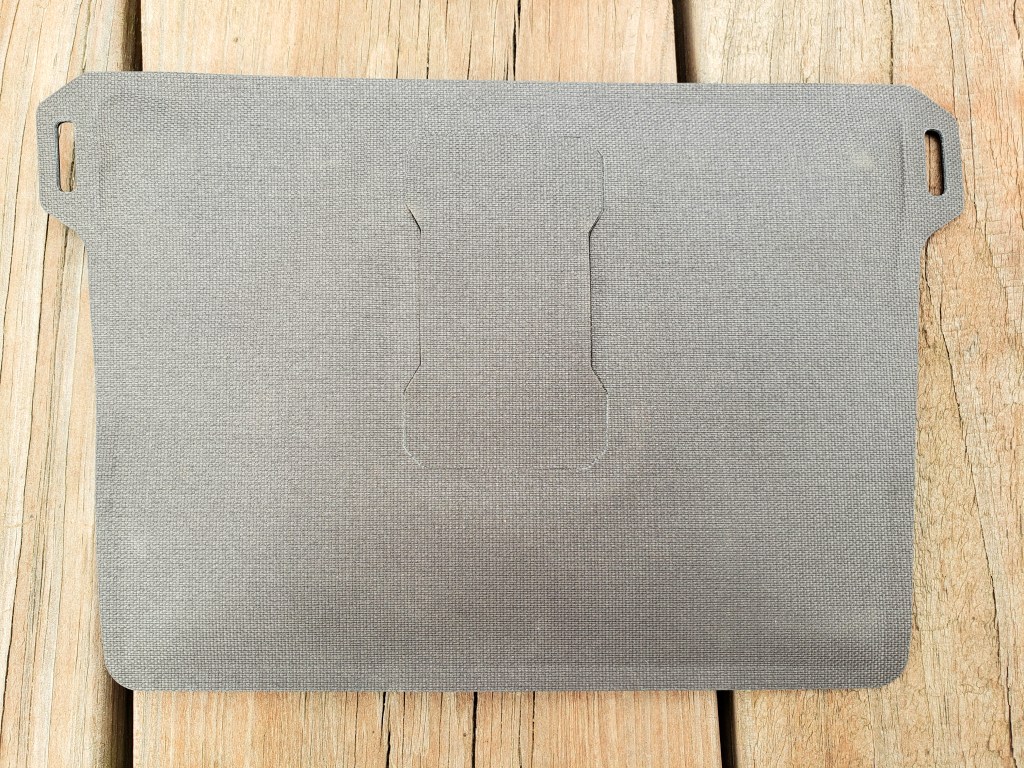
This is a very well made pack and runs $95.00 on his web store. This is the lightest pack I own for fishing, coming in at 8.75 ounces. Perfect for carrying a rainjacket, water bottle and lunch, as well as some fishing lures or small tackle pouches/boxes. The back is unpadded so I added a piece of half inch closed cell foam to protect my back from sharp objects. It is not waterproof or submersible but rather highly water resistant. I can attest to fishing in light rain for 6 hours and everything stayed dry.
I don’t do Tenkara fishing and have never used the rod holders on the side. Instead, I break my rods down (4-5 piece) and store them inside.
I like to have several options of gear to choose from so I can tailor my needs to the trip.
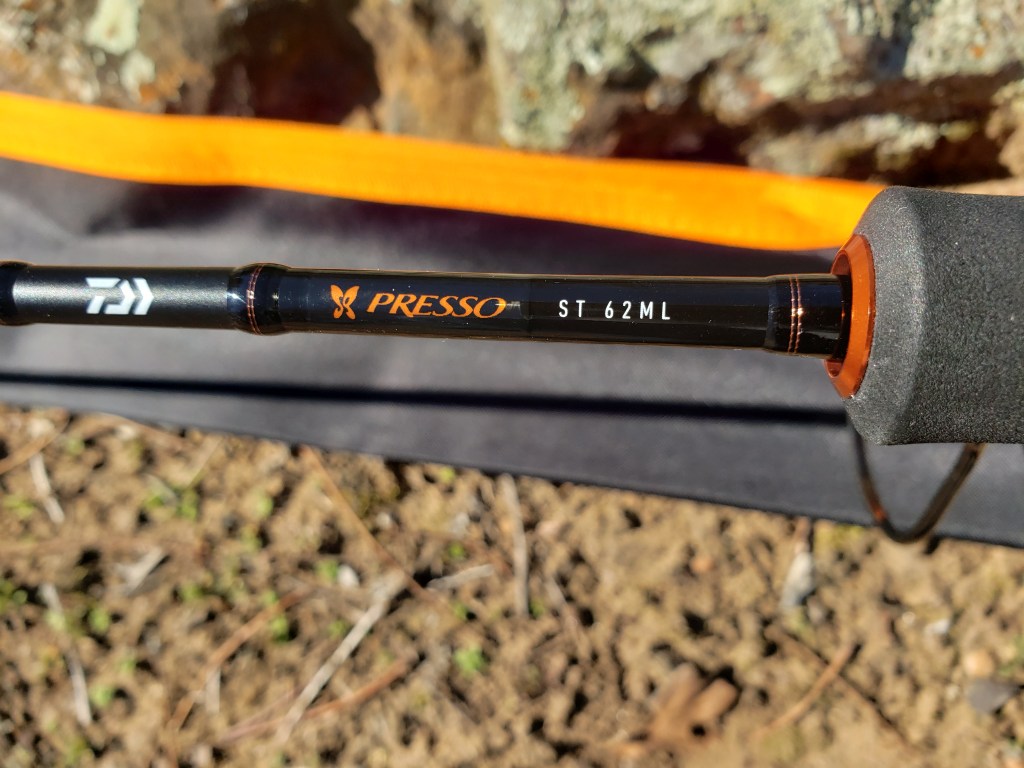
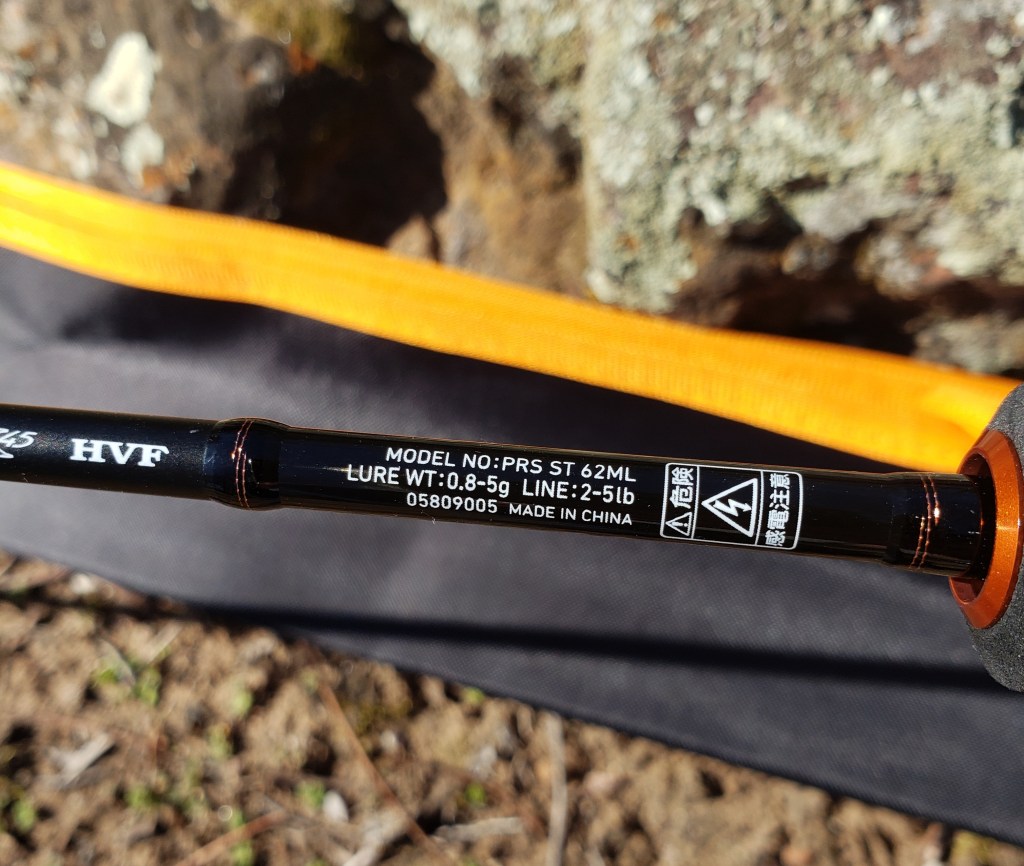
I had pre-ordered this rod back in December and it arrived today. I’ve been hearing good things about the Presso ST rods and decided to try one for 2022.
Specifications: Daiwa Presso ST 62ML
Length:6’2″
2 piece rod
97cm break-down length
Weight: 75grams
Line weight: 2-5lb
Lure weight:0.8g-5grams
8 rod eyes
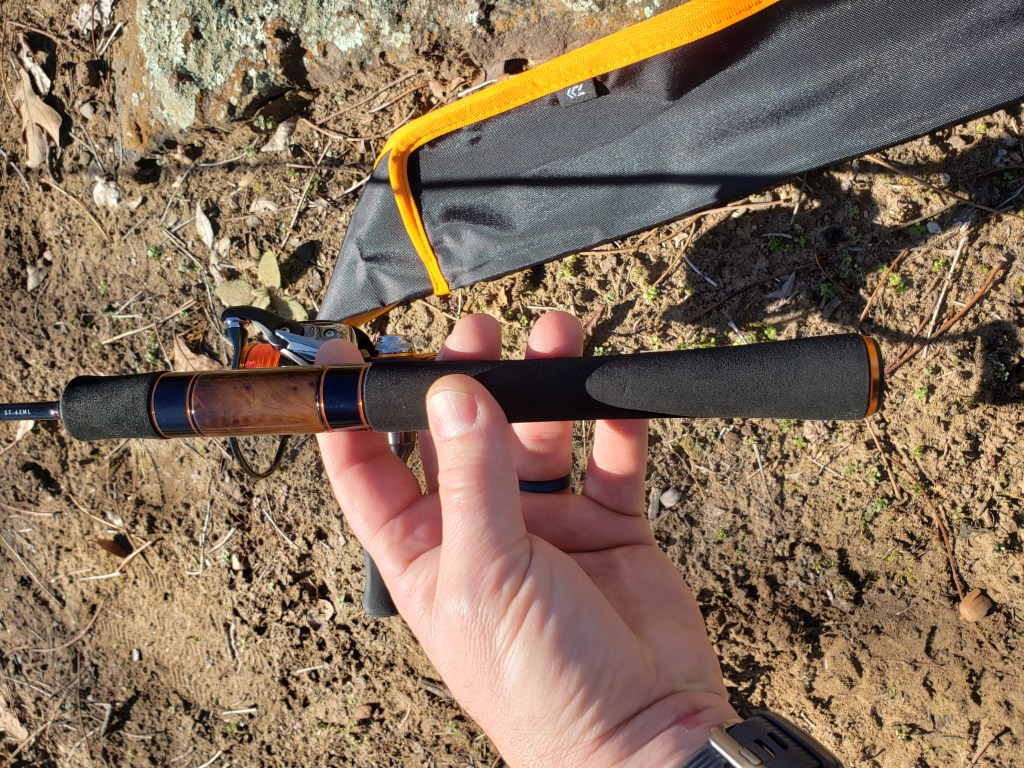
The wood reel seat is a nice touch.The handle isn’t too long.
Fit and finish is decent and the rod feels good in hand. The accents were nicely done without being too over-the-top. The balance was excellent with the 2021 Daiwa Presso LT 1000S-P. The Daiwa Presso LTD 1025 balanced well also.
I believe the Daiwa Presso rods are designed for Area trout fishing in Japan. These types of rods are designed for light lines and have a more limber/parabolic action to them as opposed to the stiffer Native trout fishing rods that are designed for stream fishing. This was the reason I opted for the ML (Medium Light) action rod to increase the stiffness a bit. This rod has a good action for our type of fishing. I would say it has a Moderate Fast tip with a stiff butt section. That will help fight fish in current better.
I don’t like my fishing to be overly complicated. Our preference is to break things down into modular components to be incorporated into a bigger System. Furthermore, we prefer to travel light and be efficient with the goals we have set.
Just one example of the concept.
Our Fishing System:
–Footwear: wading boots or shoes, neoprene socks, gravel guards etc.
–Water Filtration: Hiker Pro, Sawyers or Squeeze bottle
–Navigation: map, compass, GPS or none
–Packs: sling, shoulder, waist or backpack or just pockets
–Rods and Reels: proper choices for intended species
–First Aid Kit: small and light…not performing surgery!
When wading streams and walking over rocks and boulders all day, every extra pound carried can equal pain. We try hard to carry no more than 10 pounds and preferably less. There is always a balancing act in our gear between weight and durability. As an example, I tend to carry the Yeti Panga 28 backpack more often. With two straps the weight distribution is better than a sling pack. Yes it is heavier but is by far the most durable pack I own. In the future I will showcase a few other pack options that I have and use.
By traveling light we can move faster and go farther. Not that we are “speed fishing” or anything, but rather, we are not overburdened when hopping across boulders or trying to maintain our balance when crossing current.
Your comfort has to be factored into the System as well. Tennis shoes are a lot lighter than wading boots, however, how will your feet feel at the end of the day? I know from experience that my feet feel trashed after wearing sneakers all day while stream fishing. The beefier yet heavier wading boot has a lot more support and protection. But when factoring comfort into the equation, I’ll deal with the extra weight penalty. Besides, I’m not getting any younger!
And by implementing a modular approach into the system, it is easy to switch between packs to further reduce weight or increase convenience. With thought and planning you can custom tailor your gear to each outing or you can settle on one system and stick with it.
I am not creating anything new here, rather, I am just sharing what we use and the thought process behind our system.
Orienteering/Land Navigation is a valuable skill for us. Being able to determine exactly where we are on a map is critical. Also, it is a perishable skill and requires practice and repeated use to maintain proficiency.
For trip planning, we rely on topographical maps, Google Earth satellite images, county maps and even real estate maps sometimes. When traveling in our vehicle we rely on GaiaGPS because of its offline capabilities. We have the paid upgraded subscription for the added benefits we need. It takes some time to learn any new navigation system and this was no different. I use a Lenovo M10 FHD Plus since it has built-in GPS. That’s the main point when using a tablet for navigation: BUILT-IN GPS. My new Chuwi Hi 10X doesn’t have it.
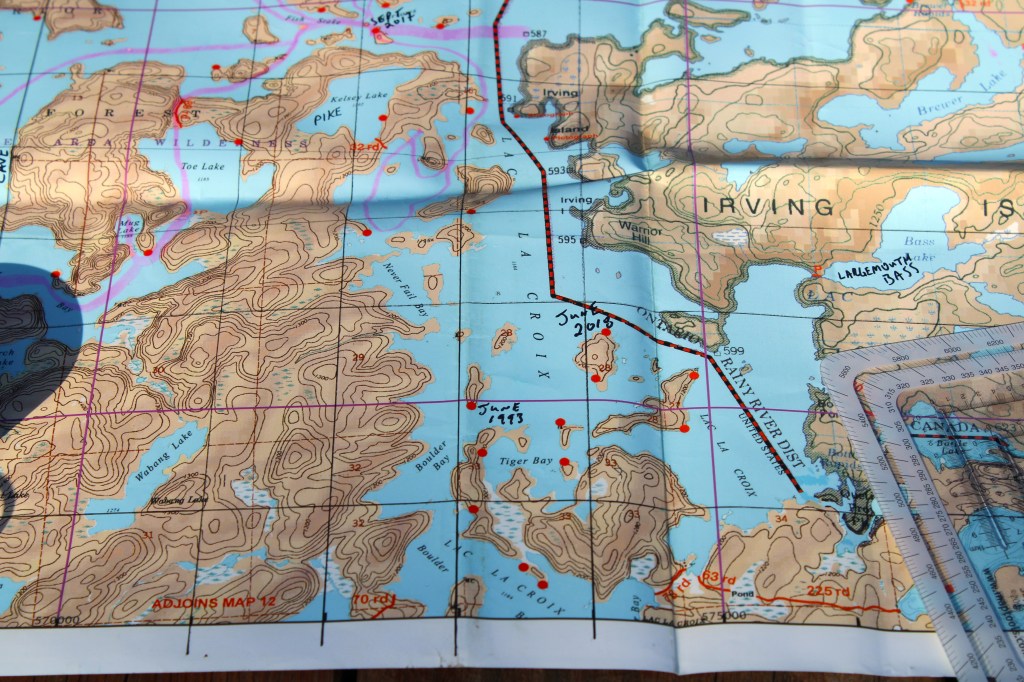
My current land navigation system of choice is a map, a compass and a GPS utilizing the UTM format and a slot tool. UTM stands for Universal Transverse Mercator which basically means the Earth has been sectioned into grids of roughly 1000 meters square.
Using the tick lines along the edge of the map, I used a ruler and drew the gridlines onto this McKenzie map of the Boundary Waters.
The GPS gives me coordinates in a UTM format. I take those coordinates and apply them to the map with a UTM Slot Tool. It sounds complicated but it is not. Once you understand the concept of using UTM it becomes really fast and accurate.
One form of slot tool that is available.
There is a company that I purchase my slot tools from called MapTools and their website is http://www.maptools.com
There are several options when it comes to slot tools and they also depend on your brand of map and map-scale. The prices are reasonable and I usually buy several.
I do not 100% rely on a GPS since batteries can fail or electronics can fizzle out, so having basic Orienteering skills is a must. Rather, I try to use all of the tools available at my disposal to get the job done.
This method comes in handy when locating backcountry camp sites, marking fishing hotspots, points of interest and even general location as well as time management. We always carry Gazeteers or topographical maps of the areas we are camping/fishing in.
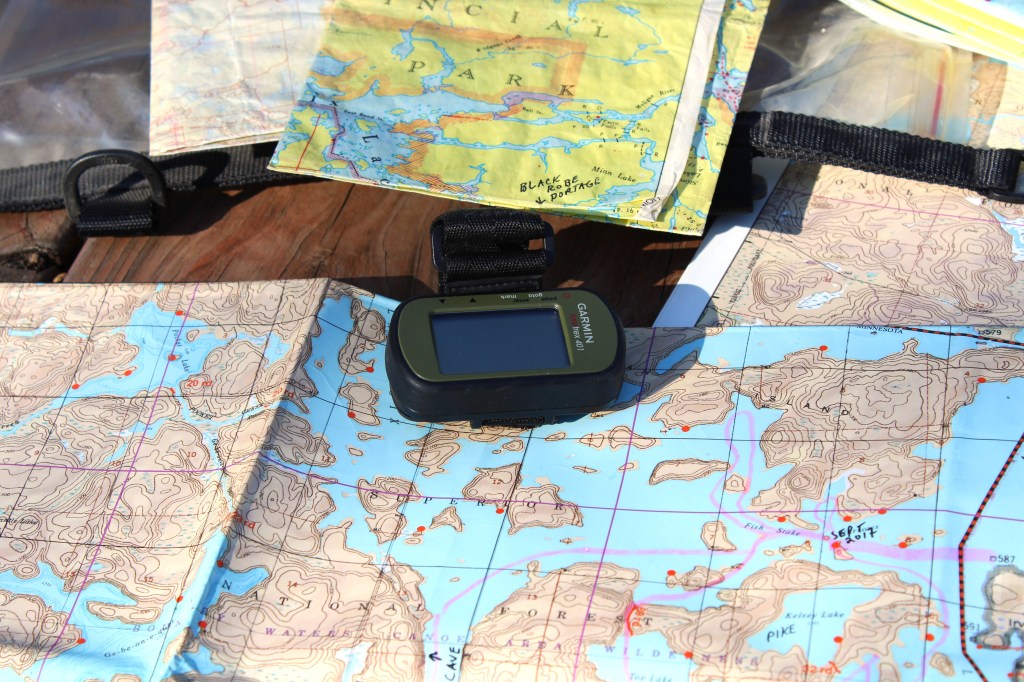
Smallest, functional GPS I could find at the time: Garmin Foretrex 401.
My compass of choice for taking a bearing is the USGI Cammenga. Pricey, but rugged and the easiest I have found to shoot an azimuth. Baseplate compasses such as Suunto or Silva are great too for using in conjunction with a map. I carry a Suunto as a backup.
MapTools has a kit for beginners who want to use the UTM system and a slot tool. It is very thorough and helpful in explaining and putting to use the concept of UTM.
This might sound like overkill for fishing but something to consider is that backcountry forest roads are notorious for always changing or not showing up on maps. Logging roads are even worse. When getting turned around or temporarily confused, it’s a simple matter of reading the GPS coordinates, pulling out a map and a slot tool, and fixing your current position. You can make informed decisions from there and decide what to do next.
There are many benefits to the UTM system and it might be worth exploring. Thanks for reading and I hope this post was useful.
NOTE: UTM or Universal Transverse Mercator is made up of 3 components.
The above photo displays the various methods we use to filter our water while out fishing. Obviously we don’t carry them all at once but rather tailor them to each trip. It depends on how many people are along, what packs we are using and how long the trip will last.
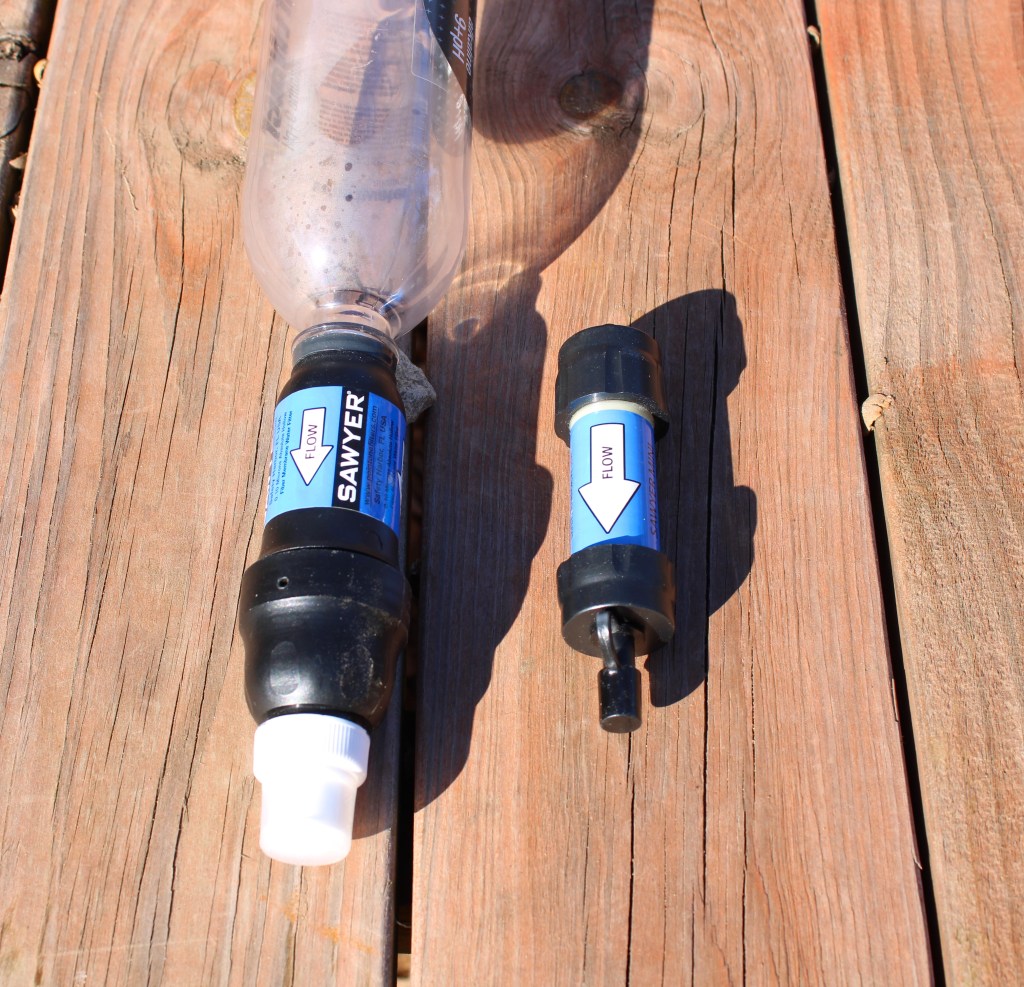
We tend to use this option the most. Scoop up water, screw the filter/cap back on and squeeze.These are a great option because they’re cheap and effective.
The Sawyer Squeeze and Sawyer Mini filters are compact and screw onto most water bottles. I have used the Squeeze in a homemade gravity filter for large groups. They can be connected to water bladders as well. Some people prefer carrying water bottles but I don’t like toting the extra weight. I tend to reuse plastic water bottles for a long time so one is enough for me. We’ve used the Sawyer filters for years and have never had an issue. And being able to backflush them extends their lifespan.
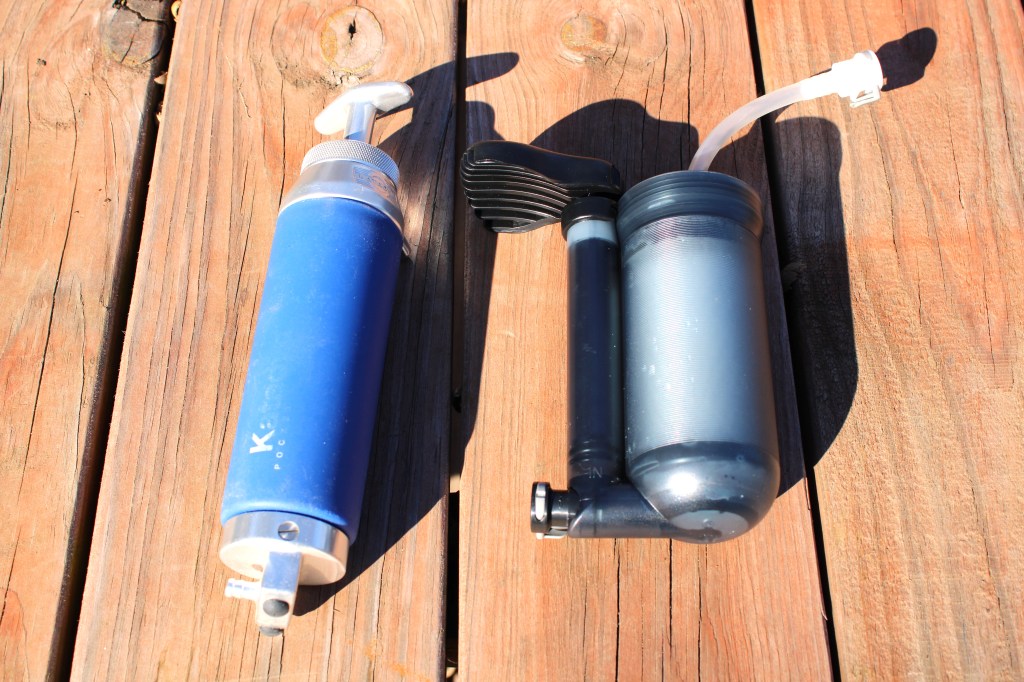
We use these when base camping.The Katadyn Hiker Pro.
The Hiker Pro has been our workhorse. It’s simple and fast. The cost is reasonable for what you get. I like the fact that is has quick disconnect fittings. This allows me to hook it directly to a bladder and fill it up.
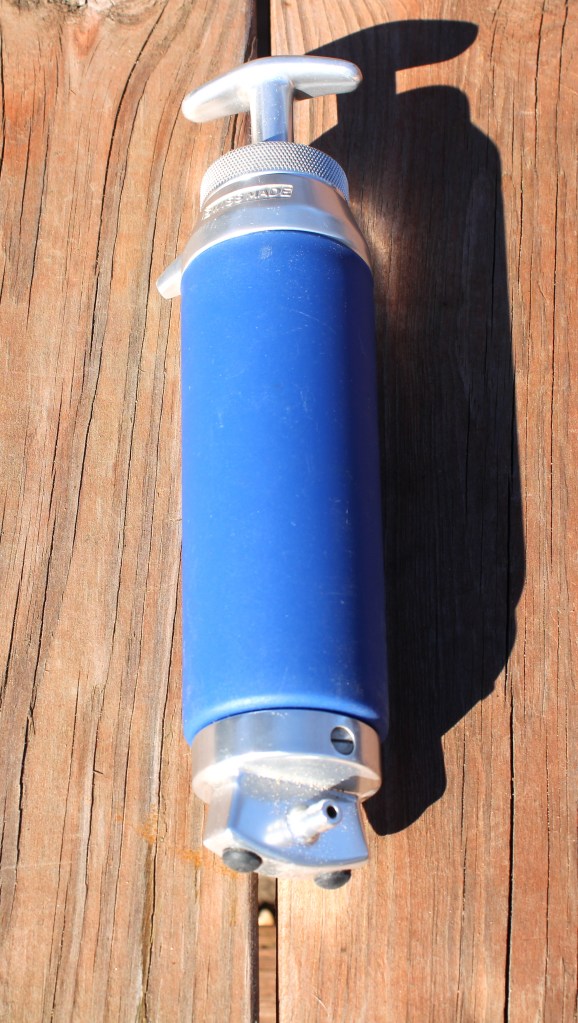
An original Katadyn/PUR filter.
This filter is HEAVY! It uses a silver impregnated ceramic filter and guarantees that it removes viruses. A big plus if you travel where water supplies are super sketchy. It’s Swiss made with machined aluminum fittings. It is also VERY SLOW and your arms will get a workout.
When space is at a premium, these are a nice bit of kit.
This is not an exhaustive review of the multitude of filters that are available. I’m just sharing what we have, use and carry on a regular basis. I can vouch for each of these models since we’ve had them for multiple years. The only downside to any of these filters is you do NOT want them to freeze. If it’s really cold, I keep them in a jacket pocket or even in my sleeping bag during the night. After each trip we also back flush them and let them dry completely before storing.
I did a blog post about using JDM (Japanese Domestic Market) fishing tackle about a year ago and I thought I’d do a follow up post.
I find the Japanese fishing industry very interesting. The gear, the specialization and the sheer mass of tackle at their disposal is fascinating. The cutting edge equipment and ever-evolving techniques is something to keep an eye on.
So when the wife and I made the plunge into JDM gear, we were clueless and taking big risks. Sure we had done some preliminary research, but there wasn’t a whole lot out there on our specific fishing style. Not saying that we are unique in any way, but that there appeared to be a gap between Trout fishing and Bass fishing, our style tended to blur the lines between the two.
The emphasis out there seemed to be on SUL, XUL and UL rods and then over to M,MH and H rods. We were looking at L (light) to ML (medium light) rods. Our plans were to fish rivers and streams with current yet the fish would generally be 3 pounds or less. We would just have to buy and try and hope for the best.
If you’ve read my blog then you have seen all of the rods and reels we have purchased so I won’t go into depth in regards to those.
What I will tell you is that these rods and reels took our fishing to the next level. Sensitivity was better, construction quality was better, they were lighter and smoother as well. The main thing was that they increased our enjoyment of fishing and it is hard to put a price on that.
I am NOT badmouthing any of the rods and reels you can purchase locally. I’ve fished with them for years and years. I just wanted something a bit more…a bit better.
And we found them! The Major Craft brand has been excellent in price vs performance. The TenRyu rods are true Japanese made rods and are outstanding, yet pricey. Tailwalk rods have great aesthetics and functionality. None of our rods are classified as high-end JDM rods by a long shot.
The pure joy of using these rods has made fishing truly fun again for us. Even the wife noticed and commented that she hadn’t seen me smile that much in a long time. Keep in mind that we are not wealthy by any means. I was forced to work overtime for months and we opted to use some of that income to purchase the items you see on the blog. But in hindsight, I would have no qualms about buying any of the rods we have with whatever money we had available. To me, they were worth the expenditure.
It was never about “snobbery” or being trendy. It was about finding joy and filling a niche in our style of fishing. MISSION ACCOMPLISHED.
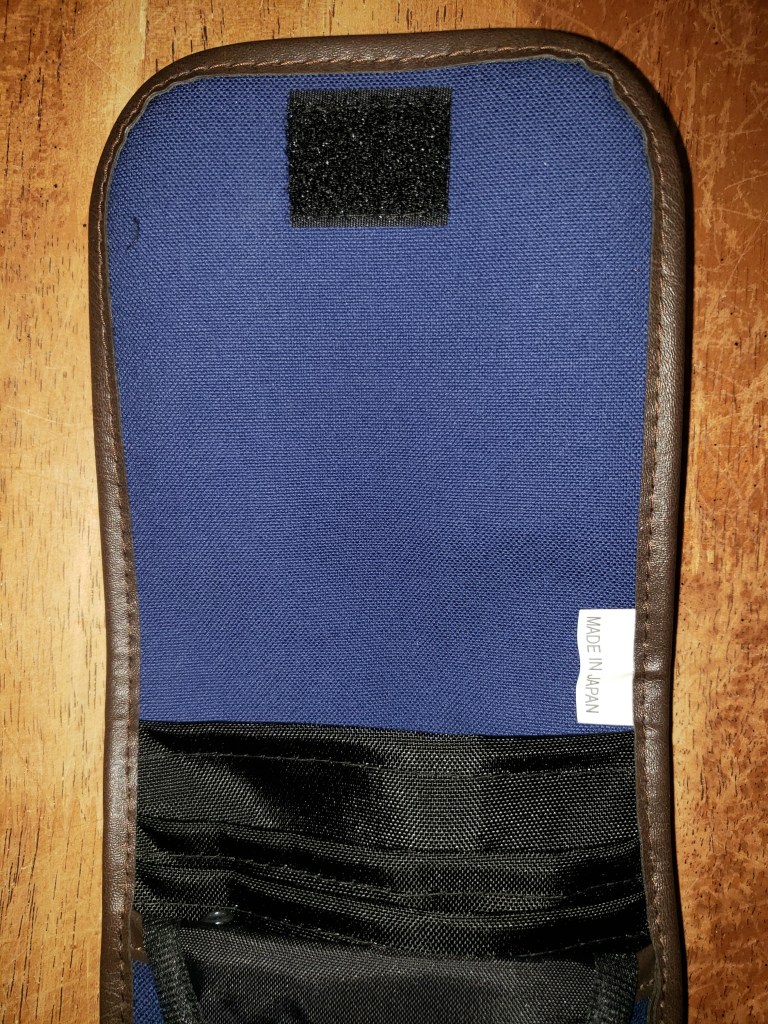
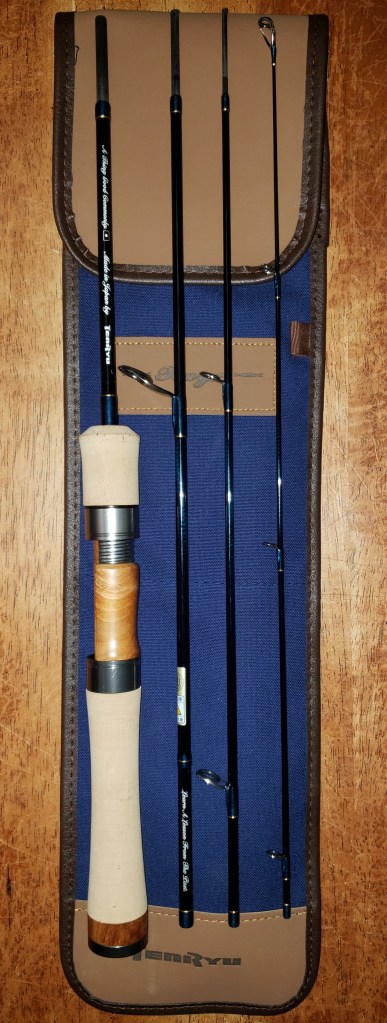
This rod was a surprise Valentine’s gift for my wife. We were talking awhile back and she casually mentioned that she could use another rod for her pack. We both routinely carry a backup rod in our packs for various reasons.
This was the first rod that I have ever pulled out of our mailbox. Usually they are in a box and the postal carrier stashes them in the bushes behind our fence. I received delivery confirmation via text message and headed outside to get it. I searched the usual spots and didn’t see anything. But upon opening the mailbox…there it was. I was quite surprised.
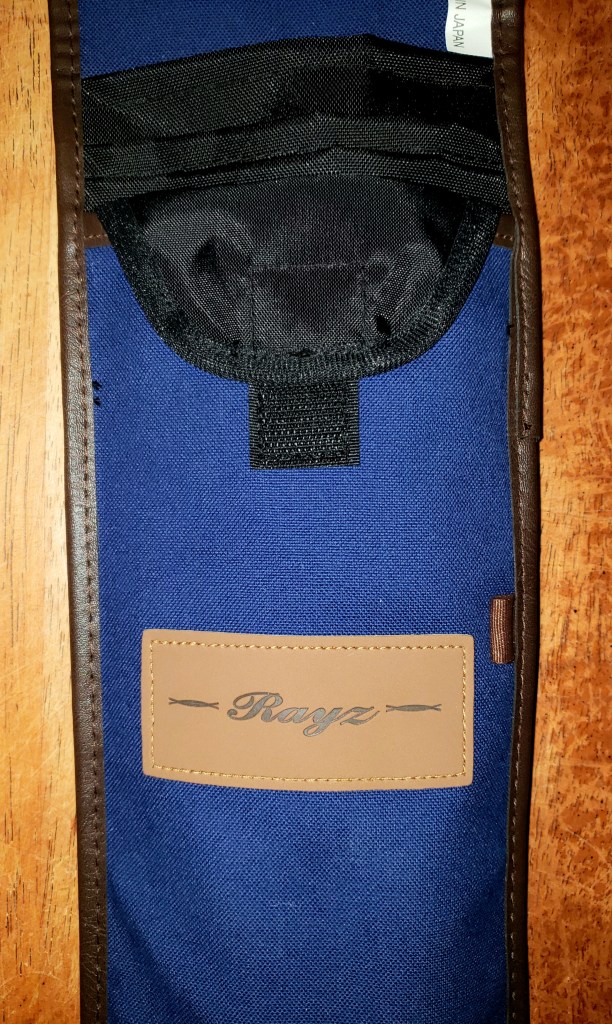
Nicely trimmed,Individual sleeves for each rod section.I’ll never understand Japanese rod names.“Learn A Lesson From The Past”Very nice cork!“A Thing Good Commonly”Length was 18 inches, Width was 5.75 inches.
I apologize for the lackluster photos. It was late and “someone” really wanted to play with this rod. From what little time I held it…the action seemed pretty good with some whip in the tip sections and a nice parabolic bend into a stiff butt section. I think it will make a great stream rod. It should pair well with a 1000 to 2000 size reel. The deep blue rod blank was different, almost all of our rods are black/grey.
I can confirm that it fits inside her Patagonia Stormfront sling pack…as that’s the last place I saw it. I think it will be a good fit for her and that she will really enjoy fishing with it. And just so everyone knows…she is not the type to go fishing with me where she ends up reading a book or sunbathing. No, she’s wading rivers and streams, tying her own lures on and handling all of her own fish. She fishes hard and manages all of her own equipment. She is a valuable asset to this fishing team of two!